

 Manufacturers
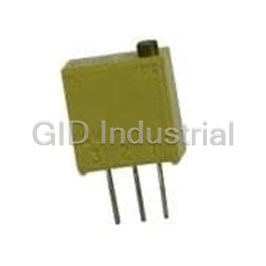
HONEYWELL W8635-A

Description
Damper Interface Module 12-Pin
W8635-A
Part Number
W8635-A
Price
Request Quote
Manufacturer
HONEYWELL
Lead Time
Request Quote
Category
Semiconductors » Specialized Interfaces
Specifications
Manufacturer
Honeywell
Manufacturers Part #
W8635-A
Industry Aliases
W8635A
Sub-Category
Specialized Semicondutor Interfaces
Brand
Clarostat
Factory Pack Quantity
1
Datasheet

Extracted Text
W8703A Damper Interface Module INSTALLATION INSTRUCTIONS Outdoor temperature display in all zones with only APPLICATION one C7089B Outdoor Temperature Sensor connected. The W8703A Damper Interface Module (DIM) controls Vacation Hold in all zones. up to three conventional zone dampers when used with Check LED in all zones (when used with the T8635L Microelectronic Communicating Programmable W8635B Equipment Interface Module for heat Thermostats and the W8635 Equipment Interface pumps). Module, Table 1. The W8703A uses Enviracom, a low- System switch setting automatically changes in all cost wired communications protocol. zones. Individual fan control in each zone. Using the W8703A Damper Interface Module with up to three T8635L Microelectronic Communicating Program- NOTES: mable Thermostats and a W8635A,B Equipment Up to three T8635 Thermostats can be con- Interface Module enables the following features: trolled with the W8703A Damper Interface Module. Time synchronization. Up to six zones can be controlled using two Shared filter indication. W8703A and up to nine zones can be con- trolled using three W8703A. Table 1. W8703A Description. Model Application Recommended Zone Dampers Comments W8703A Controls up to Trol-A-Temp Model AOBD Use with T8635L Microelectronic Communicating Programmable three zone or dampers. Trol-A-Temp Model ARD Thermostat and W8635A,B Equipment Interface Modules. or Trol-A-Temp Model ZD 3. Installer must be a trained, experienced service Required Accessories technician. 1. T8635L Microelectronic Communicating Pro- 4. After installation is complete, check out product grammable Thermostat. operation as provided in these instructions. 2. W8635A Equipment Interface Module for up to 5. Follow local codes for installation and application. 2H/2C conventional applications or W8635B Equipment Interface Module for up to 2H/1C heat pump applications. CAUTION Voltage Hazard. Can cause electrical shock or equipment INSTALLATION damage. Disconnect power before beginning installation. When Installing this Product . . . 1. Read these instructions carefully. Failure to follow Location them could damage the product or cause a haz- Locate the W8703A in the equipment room near the ardous condition. HVAC equipment. See Fig 1. 2. Check the ratings given in the instructions and on the product to make sure the product is suitable for your application. ® U.S. Registered Trademark 69- 1344- 1 Copyright © 2002 Honeywell All Rights Reserved W8703A DAMPER INTERFACE MODULE WALL W8703 W8703A MOUNTING HOLES (2) MOUNTING SCREWS (2) FURNACE OR BOILER M13427 WATER HEATER Fig. 1. Mounting W8703A on wall or duct. Mounting M13440 CAUTION Fig. 2. Mounting W8703A Damper Interface Module. Mounting Location Hazard. Mounting W8703A inside HVAC equipment can damage the DIM. WIRING Mount the W8703A only on the outside of HVAC equipment. 1. Remove the cover from the W8703A by pulling it CAUTION from the center or the corners of the module. Voltage Hazard. 2. Locate the two mounting holes. See Fig 1. Can cause electrical shock or equipment 3. Position the W8703A on the wall or the cold air damage. return. Disconnect power before beginning installation. 4. Level the W8703A for appearance only; the device will function properly even when not level. All wiring must comply with local codes and ordinances. 5. Use a pencil to mark the position of the mounting Use the following steps: holes on the wall or cold air return. 6. Remove the W8703A from the wall or cold air 1. Loosen the terminal screws on the W8703A and return and drill 3/16 in. holes in the wall (if drywall) connect the system wires; see Fig. 3 and Table 2. where marked. For firmer materials such as plas- 2. Securely tighten each terminal screw. ter or wood, drill 7/32 in. holes. See Fig. 2. 7. Gently tap the anchors (provided) into the holes FOR WRAPAROUND FOR STRAIGHT INSERTION until flush with the wall. INSERTION STRIP STRIP 5/16 IN. (8 MM). 8. When mounting on the cold air return, drill a pilot 7/16 IN. (11 MM). hole where marked. 9. Reposition the W8703A over the holes. M4826 10. Loosely insert the screws into the holes. 11. Tighten the screws. Fig. 3. Correct wiring technique. 69-1344-1 2 OPEN CLOSE 1 2 OPEN 3 CLOSE OPEN TR1 TR2 CLOSE COM ZONE A ZONE C ZONE B W8703A DAMPER INTERFACE MODULE Table 2. Terminal Designations W8703A Terminal Designations Function 1 To communications bus. 2 To communications bus. 3 To communications bus. a TR1 To external 24 Vac transformer to power zone dampers. a TR2 To external 24 Vac transformer to power zone dampers. b Zone A Open Connect to zone 1 zone damper. Closed b Zone B Open Connect to zone 2 zone damper. Closed b Zone C Open Connect to zone 3 zone damper. Closed a Transformer must be appropriately sized to supply power to total damper load (60 VA maximum). b 30 VA maximum damper load per zone. 3. See Fig. 4 to wire the T8635L, W8635A and 9. If the application is for 4-6 forced air zones, then W8703A in forced air systems. connect an additional W8703 and a correspond- 4. See Fig. 5 and 6 to wire hydronic heat with V8043 ing transformer. For 6-9 zones, then connect a zone valves. third W8703 and a corresponding transformer. 5. See Fig. 7-9 to wire hydronic heat with circulators. See SETTINGS for instructions on how to set the 6. See Fig. 10 to wire hydronic heat with V8043 DIP switches on the W8703 zone valves and an indirect water heater. 10. If the application is for 4-6 hydronic zones, con- 7. See Fig. 11 to wire hydronic heat with time-out on nect an additional W8703 and a corresponding an indirect water heater. transformer. Wire the second W8703 COM termi- 8. Connect a 24 VAC transformer to the W8703. nal to terminal 4 on the R8222N1011, and termi- Connect HVAC system 24 VAC to the W8635. nal number 6 on the relay to zone 4-6 zone valves Provide disconnect means and overload protec- or circulator relays. For 7-9 hydronic zones use tion as required. the normally open contacts on a 4PDT 4 pole relay in the same way for each of the three W8703 panels. T8635L T8635L T8635L C7089B OUTDOOR TEMPERATURE 2 2 OT OT 1 2 3 OT OT 1 3 OT OT 1 3 SENSOR W8635A W8703A 46 5 Z FAN 13 2 X 1 RELAY OPEN 2 CLOSE HEAT 1 1 3 RELAY G 2 L2 OPEN HEAT 2 C CLOSE W1 3 RELAY 46 5 Z R W2 13 2 X L1 Y1 COOL 1 L1 R OPEN TR1 H (HOT) RELAY (HOT) R Y2 CLOSE C TR2 L2 SYSTEM COM COOL 2 TRANSFORMER EXTERNAL RELAY 40 VA 1 46 5 Z TRANSFORMER 13 2 X 1 FACTORY INSTALLER JUMPERS. MODEL ARD MODEL AOBD OR ZD DAMPER ZONE DAMPER M13430A Fig. 4. T8635L/ W8703A/ W8635A wiring diagram. 3 69-1344-1 ZONE C ZONE B ZONE A W8703A DAMPER INTERFACE MODULE T8635L T8635L T8635L C7089B OUTDOOR TEMPERATURE OT OT 1 2 3 OT OT 1 2 3 OT OT 1 2 3 SENSOR V8043F TR W8703A TH END SWITCH TH-TR V8043F OPEN TR CLOSE 1 TH END 2 OPEN SWITCH TH-TR CLOSE 3 V8043F TR L1 OPEN TR1 (HOT) TH CLOSE TR2 L2 END COM SWITCH EXTERNAL TH-TR 40 VA TRANSFORMER T BOILER T W8635A R8222N1011 13 1 2 3 G L2 C W1 R W2 Y1 L1 R H (HOT) R Y2 C SYSTEM TRANSFORMER M20251A Fig. 5. Hydronic heat with V8043 zone valves and non-zoned air conditioning wiring diagram. 69-1344-1 4 ZONE C ZONE B ZONE A W8703A DAMPER INTERFACE MODULE T8635L T8635L T8635L C7089B OUTDOOR TEMPERATURE 2 OT OT 1 2 3 OT OT 1 2 3 OT OT 1 3 SENSOR V8043F TR W8703A TH END SWITCH TH-TR V8043F OPEN TR CLOSE 1 TH END 2 OPEN SWITCH TH-TR CLOSE 3 V8043F TR L1 OPEN TR1 (HOT) TH CLOSE TR2 END L2 COM SWITCH EXTERNAL TH-TR 40 VA TRANSFORMER T BOILER T ARD ARD ARD W8635A R8222N1011 FORCED R AIR R 13 C HEATING C AND C 1 COOLING C 2 3 G C W1 R W2 Y1 R H R Y2 C M20170A Fig. 6. Hydronic heat with V8043 zone valves and air conditioning with dampers wiring diagram. 5 69-1344-1 ZONE C ZONE B ZONE A W8703A DAMPER INTERFACE MODULE T8635L T8635L T8635L C7089B OUTDOOR TEMPERATURE 2 2 OT OT 1 2 3 OT OT 1 3 OT OT 1 3 SENSOR W8703A Zone A 1 R8222N1011 RELAYS FOR EACH CIRCULATOR Open OPEN CLOSE Zone B 1 Open 2 OPEN CLOSE 3 Zone C L1 Open OPEN TR1 (HOT) CLOSE TR2 L2 COM EXTERNAL 40 VA TRANSFORMER T BOILER T C1 C2 C3 W8635A R8222N1011 13 1 120 2 LINE VOLTAGE 3 G L2 C W1 R W2 Y1 L1 R H (HOT) R Y2 C SYSTEM TRANSFORMER M20168A 1 USE ENCLOSURE AND WIRE FOLLOWING LOCAL CODES AND ORDINANCES. Fig. 7. Hydronic heat with circulator relays and no air conditioning wiring diagram. 69-1344-1 6 ZONE C ZONE B ZONE A W8703A DAMPER INTERFACE MODULE T8635L T8635L T8635L C7089B OUTDOOR TEMPERATURE OT OT 1 2 3 OT OT 1 2 3 OT OT 1 2 3 SENSOR W8703A Zone A 1 R8222N1011 RELAYS FOR EACH CIRCULATOR Open OPEN CLOSE 1 Zone B Open 2 OPEN CLOSE 3 Zone C Open L1 OPEN TR1 (HOT) CLOSE TR2 L2 COM EXTERNAL 40 VA TRANSFORMER T BOILER T C1 C2 C3 W8635A R8222N1011 FORCED R AIR R 13 C HEATING AND C C 1 COOLING C 2 120 LINE 3 VOLTAGE G C W1 R W2 R Y1 H R Y2 C M20249A 1 USE ENCLOSURE AND WIRE FOLLOWING LOCAL CODES AND ORDINANCES. Fig. 8. Hydronic heat with circulators and non-zoned air conditioning wiring diagram. 7 69-1344-1 ZONE C ZONE B ZONE A W8703A DAMPER INTERFACE MODULE T8635L T8635L T8635L C7089B OUTDOOR TEMPERATURE 2 OT OT 1 2 3 OT OT 1 2 3 OT OT 1 3 SENSOR W8703A Zone A 1 R8222N1011 RELAYS FOR EACH CIRCULATOR Open OPEN CLOSE 1 Zone B Open 2 OPEN CLOSE 3 Zone C Open L1 OPEN TR1 (HOT) CLOSE TR2 L2 COM EXTERNAL 40 VA TRANSFORMER T BOILER T C1 C2 C3 ARD ARD ARD 120 LINE W8635A R8222N1011 VOLTAGE FORCED R AIR R 13 C HEATING C AND C 1 COOLING C 2 3 G C W1 R W2 R Y1 H R Y2 C M20167A 1 USE ENCLOSURE AND WIRE FOLLOWING LOCAL CODES AND ORDINANCES. Fig. 9. Hydronic heat with circulators and air conditioning zoned with dampers wiring diagram. 69-1344-1 8 ZONE C ZONE B ZONE A W8703A DAMPER INTERFACE MODULE T8635L T8635L T8635L C7089B OUTDOOR TEMPERATURE OT 1 2 OT OT 1 2 3 OT OT 1 2 3 OT 3 SENSOR V8043F TR W8703A TH END SWITCH TH-TR V8043F OPEN TR CLOSE 1 TH END 2 OPEN SWITCH TH-TR CLOSE 3 V8043F TR L1 OPEN TR1 (HOT) TH CLOSE TR2 L2 END COM SWITCH EXTERNAL TH-TR 40 VA TRANSFORMER T BOILER T IWH AQUASTAT T T YELLOW IWH YELLOW V8044 VALVE RA889A R(T) W(T) C L1 L2 COM N.C. X1 X2 120 VAC W8635A R8222N1011 FORCED R AIR R 13 C HEATING AND C C 1 COOLING C 2 3 G C W1 R W2 R Y1 H R Y2 C M20169A Fig. 10. Hydronic heat with V8043 zone valves and indirect water heater wiring diagram. 9 69-1344-1 ZONE C ZONE B ZONE A W8703A DAMPER INTERFACE MODULE T8635L T8635L T8635L C7089B OUTDOOR TEMPERATURE OT OT 1 2 3 OT OT 1 2 3 OT OT 1 2 3 SENSOR V8043F TR W8703A TH END SWITCH TH-TR V8043F OPEN TR CLOSE 1 TH END 2 OPEN SWITCH TH-TR V8043F CLOSE 3 TR L1 OPEN TR1 (HOT) TH CLOSE TR2 L2 END COM SWITCH EXTERNAL TH-TR 40 VA TRANSFORMER T BOILER T IWH AQUASTAT DELAY ON MODEL PMT-40 T T BREAK TIMER, 24 VAC SET FOR 30 MINUTES TRANSFORMER YELLOW IWH SENSE NC LINE V8044 YELLOW SENSE VOLTAGE VALVE COM W8635A R8222N1011 13 1 2 3 G L2 C W1 R W2 R Y1 L1 H (HOT) R Y2 C SYSTEM TRANSFORMER M20250A Fig. 11. Hydronic heat with time-out and indirect water heater with no air conditioning wiring diagram. HYDRONIC ZONING WITH ZONE VALVES Wiring W8703 For Hot Water Zoning Networked Zoning can control a hydronic system using Honeywell V8043 or similar zone valves. The zone Hydronic Zone Applications valve end switches are wired in parallel and connected to the Aquastat on the boiler. A relay is used to prevent Networked zoning can be used to control hydronic systems with or without ducted air conditioning sys- the dampers from opening when the heating system is idle. See Fig. 5. tems. The damper interface module controls a 24 Vac zone valve directly or a 120 Vac circulator using isola- In a ducted air conditioning system, dampers are con- tion relays. nected as shown in Fig. 6. Power closed, spring open, round ARD or rectangular ZD dampers are recom- mended. Three-wire, power open/power closed dampers such as the AOBD are wired as follows: 69-1344-1 10 ZONE C ZONE B ZONE A W8703A DAMPER INTERFACE MODULE The first W8703 Damper Interface Module drives the SETTINGS zone valves using its open contacts. The second W8703 Damper Interface Module, addressed with the same DIP switch settings as the T8635 Thermostat Settings first W8703 (Fig. 12-14) drives the AOBD damper. The T8635 Thermostats must be configured using AOBD dampers open and close on a call for heat Installer Setup. See Installer Setup 51 in Table 6 of the and on a call for cool. An optional isolation relay can T8635 Thermostat Installation Instructions. be used to depower the common wire to the second W8703 to prevent a call for heat from the operating Set Installer Setup 51 for the correct cycle rate. Use 6 damper on a call for heat. Wire the coil to Y1 and C cph for conventional forced air. Use 3 cph for high-effi- on the W8635A. ciency forced air or hydronic applications. NOTE: The transformer must be appropriately sized to Set Installer Setup 5 to the number of stages of heat. supply power to the total valve load (60 VA For example, set to 1 for a single-stage heat system. maximum or 30 VA maximum valve load per zone). Set Installer Setup 8 for the number of stages of cool- ing. For example, for one stage of cooling, set it to 1. HYDRONIC ZONING WITH CIRCULATORS For a heat only application, set it to 0. Networked zoning can control a hydronic system zoned with circulators. The damper module damper terminals are wired to isolation relays that control the 120 Vac cir- W8703 DIP Switch Settings cuator. See Fig. 8. Zones a, b, and c on the W8703 correspond with the thermostat configuration zones 1, 2, and 3, respectively. If the system uses ducted air conditioning, wire using DIP switches are set in the factory as shown in Fig. 12. Fig. 9. PRIORITY ZONING When an indirect water heater (IWH) is used, the 1 domestic water can be put on a priority zone. This 0 directs all the available heat from the boiler to the IWH, ZONES 1-3 if present, when a call for domestic hot water occurs. M13428 Fig. 10 shows an isolation relay used to remove power Fig. 12. Zones 1-3 DIP switch settings. from the room-heating zones valves whenever the IWH Aquastat calls for heat. In addition to powering the isola- When two W8703 are connected and the DIP switch is configured on the second module as shown in Fig. 13, tion relay, the IWH Aquastat also powers the zone valve for the IWH loop. zones a, b, and c on the W8703 correspond with the thermostat configuration zones 4, 5, and 6, respectively Fig. 11 shows a method of adding a time-out feature to . Fig. 10. This feature prevents the Aquastat from steal- ing the heat for extended periods. 1 0 RELAY AND BOILER CONTROL PANELS ZONES 4-6 Networked zoning can control Honeywell zone valve or M20252 circular panels. Wire similar to Fig. 7 but wire the nor- mally open contacts on the circulator relays to zone Fig. 13. Zones 4-6 DIP switch settings. thermostat R or W contacts on the panel. When three W8703 are connected and the DIP switch is On Argo or Taco panels, connect the normally open configured on the third module as shown in Fig. 14, contacts to the TT terminals on the panel. zones a, b, and c on the W8703 correspond with the thermostat configuration zones 7,8 and 9, respectively. On Tekmar panels, connect the normally open contacts where the end switches or thermostats are shown in the Tekmar installation instructions. 1 0 ZONES 7-9 M20253 Fig. 14. Zones 7-9 DIP switch settings. 11 69-1344-1 W8703A DAMPER INTERFACE MODULE To test for proper wiring of the W8703A and the associ- LED Indicators ated zone dampers: There are four LED on the W8703A used to indicate 1. Make sure that the zone thermostats are not call- damper position and system communications. ing for heating or cooling and that the thermostat Fan setting is in the Auto position. All heating and DAMPER POSITION LED cooling equipment, including the system fan, Three two-color LED on the left side of the base are red should be off. All zone dampers should be in the when the W8703A is commanding the damper closed, Open position (status LED green). and green when commanding the damper open. 2. Initiate a call for heating or cooling on the Zone 1 thermostat. The system should start, the Zone 1 COMMUNICATION LED damper should remain open and all other damp- One green LED on the right side of the base flashes ers should close. periodically to indicate that system communications are 3. Initiate the same call in each of the remaining functional. zone thermostats. The damper in each zone should open in response to this action. 4. Remove the call for heating or cooling in each thermostat. The damper in each zone should CHECKOUT AND TEST close in response to this action. 5. After all calls for heating and cooling are When power is initially applied to the W8703A, the con- removed, the system blower should stop and all nected dampers are in the Open position. dampers should return to the Open position. TROUBLESHOOTING GUIDE Symptom Possible Cause Action No LED are on. Panel is not powered. Check for 24 Vac between TR1 and TR2 terminals; if missing 24 Vac: Check if the circuit breaker is tripped; if so, reset the circuit breaker. Check if the Power switch on the HVAC equipment is in the Off position; if so, set to the On position. Check wiring between the thermostat and HVAC equipment replace any broken wires and tighten any loose connections. If 24 Vac is present, proceed with troubleshooting. Damper does not System Verify that system communications LED is periodically blinking; if not: open/close when communications are Check wiring of system. Verify that system terminals 1, 2 and 3 expected. incorrectly connected. are correctly connected. Damper is incorrectly Verify correct color of LED is visible: red for Closed and green for connected to Damper Open; if correct: Interface Module. Check wiring of damper. Verify that Open, Close and Com terminals are correctly connected to damper terminals. �������������������������������� ���������� ����������������������������������� ������������������������ ���������������� ������� �����!�"�����#$$ %���&������!�’������ "$����( Printed in U.S.A. on recycled 69-1344-1 G.H. Rev. 1-02 www.honeywell.com/yourhome paper containing at least 10% post-consumer paper fibers.
Frequently asked questions
How does Electronics Finder differ from its competitors?

Is there a warranty for the W8635-A?
Which carrier will Electronics Finder use to ship my parts?
Can I buy parts from Electronics Finder if I am outside the USA?
Which payment methods does Electronics Finder accept?
Why buy from GID?

Quality
We are industry veterans who take pride in our work

Protection
Avoid the dangers of risky trading in the gray market

Access
Our network of suppliers is ready and at your disposal

Savings
Maintain legacy systems to prevent costly downtime

Speed
Time is of the essence, and we are respectful of yours
Related Products
Safety Sensitive Edges FF-SDC100R2
Safety Sensitive Edges FF-SDER11A2
Safety Sensitive Edges FF-SDZJUNCA
Safety Sensitive Edges FF-SDZPC253001
Safety Sensitive Edges FF-SDZPC253025
Request a Quote

The quote request has been received
Close

Facing challenges or have inquiries? Feel free to contact us!
Call Us +1-469-283-2440
What they say about us
FANTASTIC RESOURCE
One of our top priorities is maintaining our business with precision, and we are constantly looking for affiliates that can help us achieve our goal. With the aid of GID Industrial, our obsolete product management has never been more efficient. They have been a great resource to our company, and have quickly become a go-to supplier on our list!
Bucher Emhart Glass
EXCELLENT SERVICE
With our strict fundamentals and high expectations, we were surprised when we came across GID Industrial and their competitive pricing. When we approached them with our issue, they were incredibly confident in being able to provide us with a seamless solution at the best price for us. GID Industrial quickly understood our needs and provided us with excellent service, as well as fully tested product to ensure what we received would be the right fit for our company.
Fuji
HARD TO FIND A BETTER PROVIDER
Our company provides services to aid in the manufacture of technological products, such as semiconductors and flat panel displays, and often searching for distributors of obsolete product we require can waste time and money. Finding GID Industrial proved to be a great asset to our company, with cost effective solutions and superior knowledge on all of their materials, it’d be hard to find a better provider of obsolete or hard to find products.
Applied Materials
CONSISTENTLY DELIVERS QUALITY SOLUTIONS
Over the years, the equipment used in our company becomes discontinued, but they’re still of great use to us and our customers. Once these products are no longer available through the manufacturer, finding a reliable, quick supplier is a necessity, and luckily for us, GID Industrial has provided the most trustworthy, quality solutions to our obsolete component needs.
Nidec Vamco
TERRIFIC RESOURCE
This company has been a terrific help to us (I work for Trican Well Service) in sourcing the Micron Ram Memory we needed for our Siemens computers. Great service! And great pricing! I know when the product is shipping and when it will arrive, all the way through the ordering process.
Trican Well Service
GO TO SOURCE
When I can't find an obsolete part, I first call GID and they'll come up with my parts every time. Great customer service and follow up as well. Scott emails me from time to time to touch base and see if we're having trouble finding something.....which is often with our 25 yr old equipment.
ConAgra Foods