

 Manufacturers
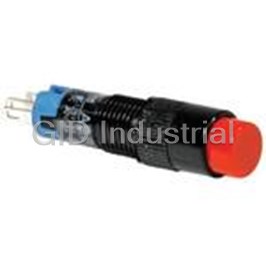
IDEC CORPORATION HS9Z-DH5LH

Description
Left-Hand Door
HS9Z-DH5LH
Part Number
HS9Z-DH5LH
Price
Request Quote
Manufacturer
IDEC CORPORATION
Lead Time
Request Quote
Category
Thermal Management » Misc Products
Specifications
Manufacturer
IDEC Corporation
Manufacturers Part #
HS9Z-DH5LH
Lead Time
10 Week Lead Time
Industry Aliases
HS9Z-DH5LH
Sub-Categories
Miscellaneous Tools and Supplies
Factory Pack Quantity
1
Datasheet

Extracted Text
HS5E HS5E Miniature Interlock Switches with Solenoid Small safety switch with four poles and solenoid. Ideal for applications in tight spaces. • Compact body . 35 × 40 × 146 mm . Straight Actuator • Rear unlocking button for emergency escape available . Also available (SUS304) is the rear unlocking button kit . • A variety of circuits—dual safety circuit and four-circuit independent outputs available . • Gold-plated contacts . Right-angle Actuator • Spring lock and solenoid lock are available . (SUS304) • The head orientation can be rotated, allowing 8 different actuator entries . • A metal entry slot ensures high durability . Rear unlocking button • An actuator with rubber bushings alleviates the impact of actuator entry into the slot . • The actuator retention force is 1400N minimum (GS-ET-19) . • Integral cable design minimizes wiring, preventing wiring mistakes . • LED indicator indicates the solenoid status . • Double insulation structure . Angle Spring Lock Adjustable • Automatically locks the actuator without power applied to the solenoid . (vertical) • After the machine stops, unlocking is completed by the solenoid, providing high safety features . • Manual unlocking is possible in the event of power failure or maintenance . w/Rubber Sliding Actuator Bushings Solenoid Lock • The actuator is locked when energized . • The actuator is unlocked when de-energized . • Flexible locking function can be achieved for an application where locking is not required and sudden stopping of machine must be prevented . (not all models) Specifications ISO14119, IEC60947-5-1, EN60947-5-1 (TÜV approved), EN1088, GS-ET-19 (TÜV approved), UL508 (UL recognized), CSA C22.2 No. 14 (c-UL recognized), GB14048.5 (CCC approved), Applicable Standards KS C IEC60947-5-1/S1-G-1/S2-E-4 (KOSHA approved) IEC60204-1/EN60204-1 (applicable standards for use) Operating Temperature –25 to +50°C (no freezing) Relative Humidity 45 to 85% (no condensation) Storage Temperature –40 to +80°C (no freezing) Pollution Degree 3 Impulse Withstand Voltage 2.5 kV (between LED, solenoid and grounding: 0.5 kV) Between live and dead metal parts: 100 MΩ minimum Insulation Resistance Between live metal part and ground: 100 MΩ minimum (500V DC megger) Between live metal parts: 100 MΩ minimum Between terminals of the same pole: 100 MΩ minimum Electric Shock Protection Class II (IEC61140) Degree of Protection IP67 (IEC60529) Operating extremes: 100 m/s2 (10G) Shock Resistance Damage limits: 1000 m/s2 (100G) Operating extremes: 10 to 55 Hz, amplitude 0.35 mm minimum Vibration Resistance Damage limits: 30 Hz, amplitude 1.5 mm minimum Actuator Operating Speed 0.05 to 1.0 m/s Actuator HS9Z-A51: 11 mm minimum Direct Opening Travel Actuator HS9Z-A51A/A52/A52A/A53/A55: 12 mm minimum Direct Opening Force 80N minimum Actuator Retention Force 1400N minimum (GS-ET-19) (See page 38 for actuator retention force.) Operating Frequency 900 operations per hour Rear Unlock Button Mechanical Durability 3000 operations minimum (HS5E-**L) Mechanical Durability 1,000,000 operations minimum (GS-ET-19) 100,000 operations minimum (operating frequency 900 operations per hour, load AC-12, 250V, 1A) Electrical Durability 1,000,000 operations minimum (operating frequency 900 operations per hour, load 24V AC/DC. 100mA) Conditional Short-circuit Current 50A (250V) (Use 250V/10A fast acting type fuse for short-circuit protection.) UL2464 Cable HS5E-V: AWG22 (12-core, 0.3 mm2/core) Others: AWG21(8-core: 0.5 mm2/core) Cable Outside Diameter ø7.6 mm Weight (approx.) 400g (1m cable), 580g (3m cable), 770g (5m cable) . Add 20g for rear unlocking button. 31 HS5E Miniature Interlock Switches with Solenoid Solenoid Unit Ratings Locking Mechanism Spring Lock Solenoid Lock Contact Ratings Rated Operating Current 24V DC (100% duty cycle) 250V Rated Current 266 mA (initial value) Rated Insulation Voltage (Ui) (between LED or solenoid and ground: 30V) Coil Resistance 90Ω (at 20°C) 2 .5A Pickup Voltage Rated voltage × 85% maximum (at 20°C) Rated Operating temp .: Dropout Voltage Rated voltage × 10% minimum (at 20°C) Operating temp .: Thermal –25°C to 35°C (not Four-circuit 35°C to 50°C Maximum Continuous Current Independent Output included) Rated Voltage × 110% 1 .0A (1 circuit) Applicable Voltage (Ith) (HS5E-V) 2 .5A (1 or 2 circuits) 0 .5A (2 to 4 circuits) 1 .0A (3 or 4 circuits) Maximum Continuous Continuous Applicable Time Rated Voltage (Ue) 30V 125V 250V Insulation Class Class F Resistive − 2 .5A 1 .5A Load (AC-12) AC Inductive Indicator − 1 .5A 0 .75A Rated Load (AC-15) Current Rated Voltage 24V DC Resistive (Ie) 2 .5A 1 .1A 0 .55A Load (DC-12) Rated Current 10 mA DC Inductive 2 .3A 0 .55A 0 .27A Light Source LED Load (DC-13) Illumination Color Green • Minimum applicable load (reference value): 3V AC/DC, 5 mA (Applicable range may vary with operating conditions and load types .) TÜV rating: AC-15 250V/0.75A DC-13 125V/0.22A DC-13 30V/2.3A UL/c-UL rating: 125V AC/1.5A Pilot Duty 125V DC/0.22A Pilot Duty CCC rating: AC-15 250V/0.75A DC-13 125V/0.22A DC-13 30V/2.3A Part No. Development HS5E -A 44L01 -G Circuit Code Indicator Color G: Gree n Main Circuit Door Monitor Circuit Lock Monitor Circuit A: 1NC + 1NC 1NO 1NO B: 1NC + 1NC 1NO 1NC Cable Length C: 1NC + 1NC 1NC 1NO 01: 1m D: 1NC + 1NC 1NC 1NC 03: 3m F: 1NC + 1NC 2NC — 05: 5m G: 1NC + 1NC 1NC, 1NO — H: 1NC + 1NC— 2NC Rear Unlocking Button J: 1NC + 1NC— 1NC, 1NO L: With rear unlocking button Blank: Without rear unlocking button DD: 1NC + 1NC 1NC + 1NC LED Indicator Rated Voltage VA: — 1NC, 1NO 1NC, 1NO 4: 24V DC VB: — 1NC, 1NO 2NC 0: Without indicator VC: — 2NC 1NC, 1NO VD: — 2NC 2NC Solenoid Unit Voltage/Lock Mechanism 4: 24V DC/Spring Lock 7Y: 24V DC/Solenoid Lock 32 HS5E HS5E Miniature Interlock Switches with Solenoid Standard Cable Lock Mechanism Circuit Code Contact Configuration Indicator Part No . Length Door Monitor Lock Monitor HS5E-A4001 1m (Actuator inserted) (Solenoid OFF) (+) (–) 3m HS5E-A4003 Without A2 A1 5m HS5E-A4005 Main Circuit: 1NC+1NC, Door Monitor Circuit: 1NO, A Lock Monitor Circuit: 1NO 1m HS5E-A4401-G Main Circuit: 11 12 41 42 With 3m HS5E-A4403-G Monitor Circuit: 23 24 Monitor Circuit: 53 54 5m HS5E-A4405-G Main Circuit: 1NC+1NC, Door Monitor Circuit: 1NO, 1m HS5E-B4001 Lock Monitor Circuit: 1NC Without 3m HS5E-B4003 Main Circuit: 11 12 41 42 5m HS5E-B4005 B Monitor Circuit: 23 24 HS5E-B4401-G 1m Monitor Circuit: 51 52 With 3m HS5E-B4403-G 5m HS5E-B4405-G Main Circuit: 1NC+1NC, Door Monitor Circuit: 1NC, 1m HS5E-C4001 Lock Monitor Circuit: 1NO HS5E-C4003 Without 3m 5m HS5E-C4005 Main Circuit: 11 12 41 42 C Monitor Circuit: 21 22 1m HS5E-C4401-G Monitor Circuit: 53 54 With 3m HS5E-C4403-G HS5E-C4405-G 5m Main Circuit: 1NC+1NC, Door Monitor Circuit: 1NC, 1m HS5E-D4001 Lock Monitor Circuit: 1NC Without 3m HS5E-D4003 5m HS5E-D4005 11 12 41 42 Main Circuit: D 21 22 Monitor Circuit: HS5E-D4401-G 1m 51 52 Monitor Circuit: With 3m HS5E-D4403-G 5m HS5E-D4405-G Spring Lock Main Circuit: 1NC+1NC, Door Monitor Circuit: 2NC 1m HS5E-F4001 HS5E-F4003 Without 3m Main Circuit: 11 12 41 42 5m HS5E-F4005 F Monitor Circuit: 21 22 1m HS5E-F4401-G Monitor Circuit: 31 32 With 3m HS5E-F4403-G 5m HS5E-F4405-G Main Circuit: 1NC+1NC, Door Monitor Circuit: 1NC, 1NO HS5E-G4001 1m Without 3m HS5E-G4003 Main Circuit: 11 12 41 42 5m HS5E-G4005 G Monitor Circuit: 21 22 1m HS5E-G4401-G 33 34 Monitor Circuit: HS5E-G4403-G With 3m 5m HS5E-G4405-G Main Circuit: 1NC+1NC, Lock Monitor Circuit: 2NC 1m HS5E-H4001 Without 3m HS5E-H4003 Main Circuit: 11 12 41 42 HS5E-H4005 5m H Monitor Circuit: 51 52 1m HS5E-H4401-G Monitor Circuit: 61 62 With 3m HS5E-H4403-G 5m HS5E-H4405-G Main Circuit: 1NC+1NC, Lock Monitor Circuit: 1NC, 1NO HS5E-J4001 1m Without 3m HS5E-J4003 Main Circuit: 11 12 41 42 5m HS5E-J4005 J Monitor Circuit: 51 52 1m HS5E-J4401-G 63 64 Monitor Circuit: HS5E-J4403-G With 3m 5m HS5E-J4405-G • The contact configuration shows the status when the actuator is inserted and the switch is locked . • The contact configuration shows the status when the indicator is installed . • Actuators are not supplied with the interlock switch and must be ordered separately . 33 HS5E Miniature Interlock Switches with Solenoid Standard Cable Lock Mechanism Circuit Code Contact Configuration Indicator Part No . Length Door Monitor Lock Monitor 1m HS5E-A7Y001 (Actuator inserted) (Solenoid ON) (+) (–) Without 3m HS5E-A7Y003 A2 A1 5m HS5E-A7Y005 Main Circuit: 1NC+1NC, Door Monitor Circuit: 1NO, A Lock Monitor Circuit: 1NO 1m HS5E-A7Y401-G 11 12 41 42 Main Circuit: HS5E-A7Y403-G With 3m 23 24 Monitor Circuit: 53 54 Monitor Circuit: HS5E-A7Y405-G 5m Main Circuit: 1NC+1NC, Door Monitor Circuit: 1NO, 1m HS5E-B7Y001 Lock Monitor Circuit: 1NC HS5E-B7Y003 Without 3m 5m HS5E-B7Y005 Main Circuit: 11 12 41 42 B 1m HS5E-B7Y401-G 23 24 Monitor Circuit: Monitor Circuit: 51 52 With 3m HS5E-B7Y403-G HS5E-B7Y405-G 5m Main Circuit: 1NC+1NC, Door Monitor Circuit: 1NC, 1m HS5E-C7Y001 Lock Monitor Circuit: 1NO Without 3m HS5E-C7Y003 Main Circuit: 11 12 41 42 5m HS5E-C7Y005 C Monitor Circuit: 21 22 HS5E-C7Y401-G 1m 53 54 Monitor Circuit: With 3m HS5E-C7Y403-G 5m HS5E-C7Y405-G Main Circuit: 1NC+1NC, Door Monitor Circuit: 1NC, 1m HS5E-D7Y001 Lock Monitor Circuit: 1NC HS5E-D7Y003 Without 3m 5m HS5E-D7Y005 11 12 41 42 Main Circuit: D 21 22 1m HS5E-D7Y401-G Monitor Circuit: 51 52 Monitor Circuit: With 3m HS5E-D7Y403-G 5m HS5E-D7Y405-G Solenoid Lock Main Circuit: 1NC+1NC, Door Monitor Circuit: 2NC 1m HS5E-F7Y001 Without 3m HS5E-F7Y003 Main Circuit: 11 12 41 42 5m HS5E-F7Y005 F Monitor Circuit: 21 22 1m HS5E-F7Y401-G Monitor Circuit: 31 32 With 3m HS5E-F7Y403-G 5m HS5E-F7Y405-G Main Circuit: 1NC+1NC, Door Monitor Circuit: 1NC, 1NO 1m HS5E-G7Y001 Without 3m HS5E-G7Y003 Main Circuit: 11 12 41 42 HS5E-G7Y005 5m G 21 22 Monitor Circuit: 1m HS5E-G7Y401-G Monitor Circuit: 33 34 With 3m HS5E-G7Y403-G 5m HS5E-G7Y405-G Main Circuit: 1NC+1NC, Lock Monitor Circuit: 2NC HS5E-H7Y001 1m Without 3m HS5E-H7Y003 11 12 41 42 Main Circuit: 5m HS5E-H7Y005 51 52 H Monitor Circuit: 1m HS5E-H7Y401-G 61 62 Monitor Circuit: HS5E-H7Y403-G With 3m 5m HS5E-H7Y405-G Main Circuit: 1NC+1NC, Lock Monitor Circuit: 1NC, 1NO 1m HS5E-J7Y001 Without 3m HS5E-J7Y003 11 12 41 42 Main Circuit: HS5E-J7Y005 5m 51 52 Monitor Circuit: J 1m HS5E-J7Y401-G 63 64 Monitor Circuit: With 3m HS5E-J7Y403-G 5m HS5E-J7Y405-G • The contact configuration shows the status when the actuator is inserted and the switch is locked . • The contact configuration shows the status when the indicator is installed . • Actuators are not supplied with the interlock switch and must be ordered separately . 34 HS5E HS5E Miniature Interlock Switches with Solenoid Rear Unlocking Button Cable Lock Mechanism Circuit Code Contact Configuration Indicator Part No . Length Door Monitor Lock Monitor (Actuator inserted) (Solenoid OFF) 1m HS5E-A44L01-G (+) (–) A2 A1 Main Circuit: 1NC+1NC, Door Monitor Circuit: 1NO, HS5E-A44L03-G A 3m Lock Monitor Circuit: 1NO Main Circuit: 11 12 41 42 Monitor Circuit: 23 24 5m HS5E-A44L05-G Monitor Circuit: 53 54 Main Circuit: 1NC+1NC, Door Monitor Circuit: 1NC, 1m HS5E-C44L01-G Lock Monitor Circuit: 1NO C 3m HS5E-C44L03-G Main Circuit: 11 12 41 42 Monitor Circuit: 21 22 Monitor Circuit: 53 54 5m HS5E-C44L05-G Main Circuit: 1NC+1NC, Door Monitor Circuit: 1NC, 1m HS5E-D44L01-G Lock Monitor Circuit: 1NC Spring Lock With D 3m HS5E-D44L03-G Main Circuit: 11 12 41 42 21 22 Monitor Circuit: Monitor Circuit: 51 52 5m HS5E-D44L05-G Main Circuit: 1NC+1NC, Door Monitor Circuit: 2NC 1m HS5E-F44L01-G Main Circuit: 11 12 41 42 HS5E-F44L03-G F 3m Monitor Circuit: 21 22 Monitor Circuit: 31 32 5m HS5E-F44L05-G Main Circuit: 1NC+1NC, Door Monitor Circuit: 1NC, 1NO HS5E-G44L01-G 1m Main Circuit: 11 12 41 42 G 3m HS5E-G44L03-G 21 22 Monitor Circuit: Monitor Circuit: 33 34 5m HS5E-G44L05-G • The contact configuration shows the status when the actuator is inserted and the switch is locked . • Actuators are not supplied with the interlock switch and must be ordered separately . Dual Safety Circuit Cable Lock Mechanism Circuit Code Contact Configuration Indicator Part No . Length Door Monitor Lock Monitor (Actuator inserted) (Solenoid OFF) 1m HS5E-DD4401-G (+) (–) A2 A1 Spring Lock DD With 3m HS5E-DD4403-G Main Circuit: 1NC+1NC 1NC+1NC Main Circuit j: 11 12 41 42 HS5E-DD4405-G 5m 21 22 51 52 Main Circuit k: • The contact configuration shows the status when the actuator is inserted and the switch is locked . • Actuators are not supplied with the interlock switch and must be ordered separately . 35 HS5E Miniature Interlock Switches with Solenoid Four-circuit Independent Output Cable Lock Mechanism Circuit Code Contact Configuration Indicator Part No . Length Door Monitor Lock Monitor (Actuator inserted) (Solenoid OFF) 1m HS5E-VA4401-G (+) (–) A2 A1 Door Monitor Circuit: 1NC, 1NO, Lock Monitor Circuit: 1NC, 1NO 3m VA HS5E-VA4403-G Monitor Circuit: 11 12 41 42 Monitor Circuit: 23 24 5m HS5E-VA4405-G 53 54 Monitor Circuit: Door Monitor Circuit: 1NC, 1NO, Lock Monitor Circuit: 2NC 1m HS5E-VB4401-G Monitor Circuit: 11 12 41 42 VB 3m HS5E-VB4403-G Monitor Circuit: 23 24 Monitor Circuit: 51 52 5m HS5E-VB4405-G Spring Lock With Door Monitor Circuit: 2NC, Lock Monitor Circuit: 1NC, 1NO 1m HS5E-VC4401-G Monitor Circuit: 11 12 41 42 VC 3m HS5E-VC4403-G Monitor Circuit: 21 22 Monitor Circuit: 53 54 5m HS5E-VC4405-G Door Monitor Circuit: 2NC, Lock Monitor Circuit: 2NC 1m HS5E-VD4401-G Monitor Circuit: 11 12 41 42 VD 3m HS5E-VD4403-G Monitor Circuit: 21 22 Monitor Circuit: 51 52 5m HS5E-VD4405-G Door Monitor Lock Monitor (Actuator inserted) (Solenoid ON) 1m HS5E-VA7Y401-G (+) (–) A2 A1 Door Monitor Circuit: 1NC, 1NO, Lock Monitor Circuit: 1NC, 1NO VA 3m HS5E-VA7Y403-G Monitor Circuit: 11 12 41 42 Monitor Circuit: 23 24 5m HS5E-VA7Y405-G Monitor Circuit: 53 54 Door Monitor Circuit: 1NC, 1NO, Lock Monitor Circuit: 2NC 1m HS5E-VB7Y401-G Monitor Circuit: 11 12 41 42 VB 3m HS5E-VB7Y403-G Monitor Circuit: 23 24 Monitor Circuit: 51 52 5m HS5E-VB7Y405-G Solenoid Lock With Door Monitor Circuit: 2NC, Lock Monitor Circuit: 1NC, 1NO 1m HS5E-VC7Y401-G Monitor Circuit: 11 12 41 42 VC 3m HS5E-VC7Y403-G Monitor Circuit: 21 22 Monitor Circuit: 53 54 5m HS5E-VC7Y405-G Door Monitor Circuit: 2NC, Lock Monitor Circuit: 2NC 1m HS5E-VD7Y401-G Monitor Circuit: 11 12 41 42 VD 3m HS5E-VD7Y403-G Monitor Circuit: 21 22 Monitor Circuit: 51 52 5m HS5E-VD7Y405-G • The contact configuration shows the status when the actuator is inserted and the switch is locked . • Actuators are not supplied with the interlock switch and must be ordered separately . 36 HS5E HS5E Miniature Interlock Switches with Solenoid Dimensions HS5E-4-G (with indicator) Horizontal Mounting/Straight Actuator (HS9Z-A51) RP RP 41 26.4 26.4 42.2 32.9 32.9 5.2 6.2 6.2 5.2 13.4 13.4 Actuator Actuator 36.2106 36.2 106 Actuator Stop (6.3) (6.3) Actuator Stop 145.7 145.7 (supplied (supplied separately) separately) ±1 6 * Slot Plug 106 (supplied with the switch) (Note) 4-M4 (ø4.3 or M4 tapped hole) se our ounting screws to ount the interloc switch Mounting Hole Layout according to the ounting hole layout. * Actuator center position Vertical Mounting/Right-angle Actuator (HS9Z-A52) RP RP 27.7 41.5 32.9 40.3 27.7 32.9 13.4 13.4 Actuator 36.2 106 36.2 106 Acuator Cover Actuator Cover 145.7 (6.3) 145.7 (6.3) Actuator Actuator Stop Actuator Stop (supplied separately) (supplied separately) ±1 7.6 * 106 Slot Plug (supplied with the switch) (Note) 4-M4 (ø4.3 or M4 tapped hole) se our ounting screws to ount the interloc switch Mounting Hole Layout * Actuator center position according to the ounting hole layout. All dimensions in mm . HS5E-44L-G (rear unlocking button) Horizontal Mounting/Straight Actuator (HS9Z-A51) X ≤ 6 Panel mounting RP (Actuator Mounting Reference Position) 6 < X < 23 Not mountable 42.2 32.9 23 ≤ X ≤ 53 Use HS9Z-FL5* rear unlocking button kit 41 6.2 5.2 13.4 X = Panel thickness (including panel, mounting frame, and mounting plate) Note: See page 39 for details . 36.2 106 145.7 (6.3) HS9Z-A51 Actuator ±1 6 • Plug the unused actuator entry slot using the plug supplied with the switch . Rear Unlocking Button Rear Unlocking Button ø30 (supplied with the switch) 13.4 106 4-ø4.3 or M4 tapped holes 13.4 Note: With the mounting hole dimension, the rear unlocking button rod does not touch the hole even when the interlock switch moves sideways . Actuator Mounting Reference Position As shown in the figure on the right, the mounting reference Interlock Switch Interlock Switch Door Stop position of the actuator when inserted in the interlock switch is where the actuator stop placed on the actuator lightly touches the Actuator Stop interlock switch . Note: After mounting the actuator, remove the actuator stop from the actuator . Actuator Stop Actuator Cover Door Stop HS9Z-A51 Actuator HS9Z-A52 Actuator 37 ø18 Rear Unlocking Button Hole (Note) R2.2 R2.2 R2.2 R2.2 R2.2 30 30 20 29.6 28 30 20 61.6 61.6 61.6 ±1 ±1 11 12.6 ±1 28 * 11 * 5 5 20 5 27 21.5 LOCK UNLOCK 7.7 M4 22 20 20 20 11 20 20 1 20 1 33 35 33 33 35 40 20 40 11 40 35 20 to 22 20 to 22 29.6 61.6 20 61.6 20 5 28 5 20 to 22 20 20 11 20 1 20 1 33 35 33 35 40 40 106 2-ø4.3 R2.1 (M4 Holes) HS5E Miniature Interlock Switches with Solenoid Actuators Description Actuator Retention Force Part No . Straight HS9Z-A51 Straight w/rubber bushings HS9Z-A51A Right-angle 1400N minimum HS9Z-A52 Right-angle w/rubber bushings HS9Z-A52A HS9Z-A53 Angle Adjustable (vertical) Angle Adjustable (vertical/horizontal) (Note 1) 500N minimum HS9Z-A55 Note 1: When retention force of more than 500N is required, use HS9Z-A53 . Sliding Actuator (Note 2) 1000N minimum HS9Z-SH5 Note 2: For details, see page 76 . Dimensions and Mounting Hole Layouts Straight Actuator (HS9Z-A51) Right-angle Actuator (HS9Z-A52) 6.2 32.4 33 (6) 27 7.2 .2 5.2 0.8 4.5 0.8 1.6 6.4 Actuator Mounting Hole Layout (Straight, L-shaped) Actuator Stop Acuator Stop (supplied with the actuator) (Note) (supplied with the actuator) 2-M4 Screw 20 (Note) Actuator Cover Straight Actuator w/Rubber Bushings (HS9Z-A51A) Right-angle Actuator w/Rubber Bushings (HS9Z-A52A) 7.3 43.8 When mounted • The mounting center distance is set to 12 mm (39.7) 15.3 0.8 at factory. When 20-mm distance is required, When mounted (11.2) 0.8 adjust the distance by moving the rubber bushings. • The actuator has flexiblity to the direction indicated by the arrows. When 20-mm distance is selected, the actuator swings vertically. Actuator Stop (Note) Actuator Mounting Hole Layout Washer (supplied Washer (supplied with the switch) Straight (with rubber bushings) Rubber Bushing with the actuator) Right-angle (with rubber bushings) 2-ø10 2-M4 Screw 12 • When the mounting center distance is set to When mounted (5) 0.8 12 mm, the actuator has flexibility both vertically and horizontally. 2-ø9 • When the mounting center distance is set to Note: Mounting centers can be widened 20 mm, the actuator swings vertically. Adjust Rubber Bushing to 20 mm by moving the rubber the distance by moving the rubber bushings. bushings. Actuator Stop (plastic) (Note) (supplied with the actuator) Angle Adjustable (vertical) (HS9Z-A53) Angle Adjustable (vertical/horizontal) (HS9Z-A55) 18 Angle Adjustment 3 Horizontal Adjustment (M3 Hexagon Socket Head Screw) Actuator Stop Film (supplied Actuator Stop with the actuator) Orienting (Note) Insert 7 14.4 1 18.5 28.5 3.6 Vertical Adjustment 5 Orienting Actuator Stop Insert 20 29 (Note) Door hinge side Angle Adjustment (hexagon sockethead bolt) Actuator Mounting Hole Layout (vertical swing) 0.8 58 2-M6 Screw Angle Adjustment (M3 Hexagon Socket Head Screw) Note: The actuator stop is supplied with the actuator and used when adjusting the actuator position . Remove after the actuator position is determined . Actuator Mounting Hole Layout (horizontal/vertical swing) Actuator Orientation 2-M4 Screw 38 The orientation of actuator swing (horizontal/vertical) can be changed using the orienting insert (white plastic) installed on the back of the actuator . Do not lose the orientating insert, otherwise the actuator will not swing properly . 38 2-ø4.4 4-R 2.2 2-ø4.3 R3.2 20° 20° 20° 33 max. 30 28 (20) 10 20 12 (21) When mounted (5) 0.8 12 1 2 15 26 2 15 Vertical Swing 44 58 72 15.8 30 48.4 8.5 28 2-ø9 30 2-ø10 2 15 2 15 Vertical Horizontal Swing Swing (20) 20 12 2 23 26 38 ø40 4-C3 4-M4 HS5E HS5E Miniature Interlock Switches with Solenoid Accessories Description Part No . Remarks Sliding Actuator HS9Z-SH5 See page 76 for details . HS9Z-DH5RH Handle unit for right-hand door Choose according to the required opening side . Door Handle Actuator Handle unit for left-hand door HS9Z-DH5LH (See page 68) Switch cover unit HS9Z-DH5C Used for installing the interlock switch inside . Plug Actuator HS9Z-A5P HS9Z-PH5 Padlock Hasp When using the HS5E- 44L -G, provide a mounting hole for the HS9Z-SP51 Mounting Plate (Note 1) unlocking button as shown below in the mounting plate mounting hole layout . Used when the total thickness of mounting frame, panel, and HS9Z-FL53 mounting plate * is: 23 < X ≤ 33 (20 < X ≤ 30 when switch cover unit HS9Z-DH5C is used) Used when the total thickness of mounting frame, panel, and Rear Unlocking Button Kit (Note 2) HS9Z-FL54 mounting plate * is: 33 < X ≤ 43 (30 < X ≤ 40 when switch cover unit HS9Z-DH5C is used) Used when the total thickness of mounting frame, panel, and HS9Z-FL55 mounting plate * is: 43 < X ≤ 53 (40 < X ≤ 50 when switch cover unit HS9Z-DH5C is used) Note 1: When mounting HS5E-KVA0L (rear unlocking button) using a mounting plate, provide mounting holes on the mounting plate as shown below and use Rear Unlocking Button Kit (HS9Z-FL5) . Note 2: See the table at right for choosing rear unlocking button kit . Dimensions Mounting Plate (HS9Z-SP51) Manual Unlocking Key (metal) (HS9Z-T3) Drilling Rear Unlocking Button Hole (40) 40 4 (22) 130 22 Manual Unlocking Key (plastic) 4-M4 Screws 18 6.5 22 When installing the HS5E- 44L -G (rear unlocking button), provide a rear Material: Anodized aluminum A6063 unlocking button hole on the HS9Z-SP51. Weight: Approx . 180g Rear Unlocking Button Kit (HS9Z-FL5) Button (PA66) Rear Unlocking Button Kit Mounting Hole Layout Hinge + Plate 2 or 4-M4 Screws (SUS) 40 Button pressed (unlocked) 21.3 Button released 27.3 16 16 to 30 30 HS5E-L Interlock Switch (sold separately) Pin (SUS) Note: With the mounting hole dimension, the rear unlocking button rod does not touch the hole even when the Total thickness of mounting frame, interlock switch moves sideways . panel, and mounting plate: 23 to 53 mm Link Rod (SUS) Example: When mounting on 30mm-thick frame using HS9Z-SP51 mounting plate, the panel thickness is 40 (10 + 30) . Select HS9Z-FL54 rear unlocking button kit . Screw (Iron) 39 4-R6.4 ø18 Rear Unlocking Button Hole (Note) 4-R3.3 ø18 Rear Unlocking Button Hole (Note) 170 2-12.8 2-6.6 86.5 42.2 6 106 50.7 10 187 (13.4) ø10.4 64.1 (187) 73 15 15 9 3 31.5 25.9 33 60.9 ø10 ø4 25.9 33 60.9 HS5E Miniature Interlock Switches with Solenoid Circuit Diagrams and Operating Characteristics Standard and Rear Unlocking - Spring Lock Manual Unlock Status 1 Status 2 Status 3 Status 4 • Door Closed • Door Closed • Door Closed • Door Open • Door Open Interlock Switch Status • Machine cannot be • Machine ready to • Machine cannot be • Machine cannot be • Machine cannot be operated operate operated operated operated • Solenoid de-energized • Solenoid de-energized • Solenoid energized • Solenoid energized • Solenoid de-energized Press LOCK UNLOCK Door Status LOCK UNLOCK Turn the manual Press the rear unlock key unlocking button (Note 1) (Note 2) (+) (–) (+) (–) (+) (–) (+) (–) A2 A1 A2 A1 A2 A1 A2 A1 Circuit Diagram (HS5E-A4) 11 12 41 42 11 12 41 42 11 12 41 42 11 12 41 42 23 24 53 54 23 24 53 54 23 24 53 54 23 24 53 54 Closed (unlocked) Closed (locked) Closed (unlocked) Open Open Door Door Monitor Lock Monitor Main Circuit (Actuator Inserted) (Solenoid OFF) ON (closed) OFF (open) OFF (open) OFF (open) OFF (open) 11−42 (+) (–) Monitor Circuit A2 A1 HS5E-A4 (door open) OFF (open) OFF (open) OFF (open) ON (closed) ON (closed) 23-24 Main Circuit: 11 12 41 42 Monitor Circuit Monitor Circuit: 23 24 (unlocked) ON (closed) OFF (open) ON (closed) ON (closed) ON (closed) Monitor Circuit: 53 54 53−54 Main Circuit HS5E-B4 OFF (open) ON (closed) OFF (open) OFF (open) OFF (open) 11−42 Monitor Circuit Main Circuit: 11 12 41 42 (door open) OFF (open) OFF (open) ON (closed) ON (closed) OFF (open) Monitor Circuit: 23 24 23−24 Monitor Circuit: 51 52 Monitor Circuit (locked) ON (closed) OFF (open) OFF (open) OFF (open) OFF (open) 51−52 Main Circuit HS5E-C4 ON (closed) OFF (open) OFF (open) OFF (open) OFF (open) 11−42 Monitor Circuit Main Circuit: 11 12 41 42 (door closed) ON (closed) ON (closed) OFF (open) OFF (open) ON (closed) Monitor Circuit: 21 22 21−22 Monitor Circuit: 53 54 Monitor Circuit (unlocked) OFF (open) ON (closed) ON (closed) ON (closed) ON (closed) 53−54 Main Circuit HS5E-D4 ON (closed) OFF (open) OFF (open) OFF (open) OFF (open) 11−42 Monitor Circuit Main Circuit: 11 12 41 42 (door closed) ON (closed) ON (closed) OFF (open) OFF (open) ON (closed) Monitor Circuit: 21 22 21−22 Monitor Circuit: 51 52 Monitor Circuit (locked) ON (closed) OFF (open) OFF (open) OFF (open) OFF (open) 51−52 Main Circuit HS5E-F4 ON (closed) OFF (open) OFF (open) OFF (open) OFF (open) 11−42 Monitor Circuit Main Circuit: 11 12 41 42 (door closed) Monitor Circuit: 21 22 ON (closed) ON (closed) OFF (open) OFF (open) ON (closed) 21−22 Monitor Circuit: 31 32 Monitor Circuit (door closed) ON (closed) ON (closed) OFF (open) OFF (open) ON (closed) 31−32 Main Circuit HS5E-G4 ON (closed) OFF (open) OFF (open) OFF (open) OFF (open) 11−42 Main Circuit: 11 12 41 42 Monitor Circuit Monitor Circuit: 21 22 (door closed) ON (closed) ON (closed) OFF (open) OFF (open) ON (closed) Monitor Circuit: 33 34 21−22 Monitor Circuit (door open) OFF (open) OFF (open) ON (closed) ON (closed) OFF (open) 33−34 Main Circuit HS5E-H4 ON (closed) OFF (open) OFF (open) OFF (open) OFF (open) 11−42 Main Circuit: 11 12 41 42 Monitor Circuit 51 52 Monitor Circuit: (locked) ON (closed) OFF (open) OFF (open) OFF (open) OFF (open) 61 62 Monitor Circuit: 51−52 Monitor Circuit (locked) ON (closed) OFF (open) OFF (open) OFF (open) OFF (open) 61−62 HS5E-J4 Main Circuit ON (closed) OFF (open) OFF (open) OFF (open) OFF (open) 11−42 Main Circuit: 11 12 41 42 Monitor Circuit Monitor Circuit: 51 52 (locked) ON (closed) OFF (open) OFF (open) OFF (open) OFF (open) 63 64 Monitor Circuit: 51−52 Monitor Circuit (unlocked) OFF (open) ON (closed) ON (closed) ON (closed) ON (closed) 63−64 Solenoid Power A1-A2 (all model) OFF (de-energized) ON (energized) ON (energized) OFF (de-energized) OFF (de-energized) Note 1: Actuator can be unlocked manually for confirming the • The above contact configuration shows the status when the actuator is inserted and locked . door movement before wiring and energizing, and also • Main Circuit: Connected to the control circuit of machine drive part, sending interlock signals of the protective door . for emergency situation such as power failure . • Monitor Circuit: Sends monitoring signals of protective door open/closed status or protective door lock/unlock status . Note 2: When the operator is confined in a hazardous zone, the Operation Chracteristics (reference) actuator can be unlocked manually by pressing the rear (Actuator insertion position) 0 unlocking button . 3.3 (Locked position) 5.3 6.9 26.4 (travel in mm) • The operation characteristics shown in the chart above are of the Main Circuit Contacts ON (closed) Monitor Circuit (door open, NO) HS9Z-A51 . For other actuators, add 1 .3 mm . Monitor Circuit (door closed, NC) • The operation characteristics show the contact status when the Monitor Circuit (unlocked, NO) Contacts OFF (open) actuator enters the entry slot of an interlock switch . Monitor Circuit (locked, NC) 40 Contact Configuration HS5E HS5E Miniature Interlock Switches with Solenoid Standard - Solenoid Lock Unlocked with Manual Status 1 Status 2 Status 3 Status 4 Unlocking Key • Door Closed • Door Closed • Door Open • Door Open • Door Closed Interlock Switch Status • Machine cannot be • Machine ready to • Machine cannot be • Machine cannot be • Machine cannot be operated operate operated operated operated • Solenoid de-energized → • Solenoid energized • Solenoid de-energized • Solenoid de-energized • Solenoid energized energized Door Status LOCK UNLOCK Manual Unlock Status (+) (–) (+) (–) (+) (–) (+) (–) A2 A1 A2 A1 A2 A1 A2 A1 Circuit Diagram (HS5E-A7Y) 11 12 41 42 11 12 41 42 11 12 41 42 11 12 41 42 23 24 53 54 23 24 53 54 23 24 53 54 23 24 53 54 Closed (locked) Closed (unlocked) Open Open Closed (unlocked) Door Door Monitor Lock Monitor Main Circuit (Actuator inserted) (Solenoid ON) ON (closed) OFF (open) OFF (open) OFF (open) OFF (open) 11−42 (+) (–) Monitor Circuit A2 A1 HS5E-A7Y (door open) OFF (open) OFF (open) ON (closed) ON (closed) OFF (open) 23-24 Main Circuit: 11 12 41 42 Monitor Circuit: Monitor Circuit 23 24 Monitor Circuit: (unlocked) OFF (open) ON (closed) ON (closed) ON (closed) ON (closed) 53 54 53−54 HS5E-B7Y Main Circuit ON (closed) OFF (open) OFF (open) OFF (open) OFF (open) 11−42 Monitor Circuit Main Circuit: 11 12 41 42 (door open) OFF (open) OFF (open) ON (closed) ON (closed) OFF (open) Monitor Circuit: 23 24 23−24 Monitor Circuit: 51 52 Monitor Circuit (locked) ON (closed) OFF (open) OFF (open) OFF (open) OFF (open) 51−52 HS5E-C7Y Main Circuit ON (closed) OFF (open) OFF (open) OFF (open) OFF (open) 11−42 Monitor Circuit Main Circuit: 11 12 41 42 (door closed) ON (closed) ON (closed) OFF (open) OFF (open) ON (closed) Monitor Circuit: 21 22 21−22 Monitor Circuit: 53 54 Monitor Circuit (unlocked) OFF (open) ON (closed) ON (closed) ON (closed) ON (closed) 53−54 HS5E-D7Y Main Circuit ON (closed) OFF (open) OFF (open) OFF (open) OFF (open) 11−42 Monitor Circuit Main Circuit: 11 12 41 42 (door closed) Monitor Circuit: 21 22 ON (closed) ON (closed) OFF (open) OFF (open) . ON (closed) 21−22 Monitor Circuit: 51 52 Monitor Circuit (locked) ON (closed) OFF (open) OFF (open) OFF (open) OFF (open) 51−52 HS5E-F7Y Main Circuit ON (closed) OFF (open) OFF (open) OFF (open) OFF (open) 11−42 Main Circuit: 11 12 41 42 Monitor Circuit Monitor Circuit: 21 22 (door closed) ON (closed) ON (closed) OFF (open) OFF (open) ON (closed) Monitor Circuit: 31 32 21−22 Monitor Circuit (door closed) ON (closed) ON (closed) OFF (open) OFF (open) ON (closed) 31−32 HS5E-G7Y Main Circuit ON (closed) OFF (open) OFF (open) OFF (open) OFF (open) 11−42 Main Circuit: 11 12 41 42 Monitor Circuit Monitor Circuit: 21 22 (door closed) ON (closed) ON (closed) OFF (open) OFF (open) ON (closed) 33 34 Monitor Circuit: 21−22 Monitor Circuit (door open) OFF (open) OFF (open) ON (closed) ON (closed) OFF (open) 33−34 HS5E-H7Y Main Circuit ON (closed) OFF (open) OFF (open) OFF (open) OFF (open) 11−42 Main Circuit: 11 12 41 42 Monitor Circuit Monitor Circuit: 51 52 (locked) ON (closed) OFF (open) OFF (open) OFF (open) OFF (open) Monitor Circuit: 61 62 51−52 Monitor Circuit (locked) ON (closed) OFF (open) OFF (open) OFF (open) OFF (open) 61−62 HS5E-J7Y Main Circuit ON (closed) OFF (open) OFF (open) OFF (open) OFF (open) 11−42 Main Circuit: 11 12 41 42 Monitor Circuit Monitor Circuit: 51 52 (locked) ON (closed) OFF (open) OFF (open) OFF (open) OFF (open) Monitor Circuit: 63 64 51−52 Monitor Circuit (unlocked) OFF (open) ON (closed) ON (closed) ON (closed) ON (closed) 63−64 ON (energized) OFF to ON Solenoid Power A1-A2 (all model) ON (energized) OFF (de-energized) OFF (de-energized) (Note 2) (Note 1) (Note 2) Note 1: Do not attempt manual unlocking when • The above contact configuration shows the status when the actuator is inserted and locked . the solenoid is energized . • Main Circuit: Connected to the control circuit of machine drive part, sending interlock signals of the protective door . Note 2: Do not energize the solenoid for a long • Monitor Circuit: Sends monitoring signals of protective door open/closed status or protective door lock/unlock status . time while the door is open or when the door is unlocked manually . Operation Chracteristics (reference) 0 (Actuator insertion position) 3.3 (Locked position) 5.3 6.9 26.4 (travel in mm) • The operation characteristics shown in the chart above are Main Circuit Contacts ON (closed) Monitor Circuit (door open, NO) of the HS9Z-A51 . For other actuators, add 1 .3 mm . Monitor Circuit (door closed, NC) • The operation characteristics show the contact status when Contacts OFF (open) Monitor Circuit (unlocked, NO) the actuator enters the entry slot of an interlock switch . Monitor Circuit (locked, NC) 41 Contact Configuration HS5E Miniature Interlock Switches with Solenoid Dual Safety Circuit Unlocked with Manual Status 1 Status 2 Status 3 Status 4 Unlocking Key • Door Closed • Door Closed • Door Open • Door Open • Door Closed Interlock Switch Status • Machine ready to • Machine cannot be • Machine cannot be • Machine cannot be • Machine cannot be operate operated operated operated operated • Solenoid de-energized • Solenoid energized • Solenoid energized • Solenoid de-energized • Solenoid de-energized Door Status LOCK UNLOCK LOCK UNLOCK Turn the manual unlock key (Note) (+) (–) (+) (–) (+) (–) (+) (–) A2 A1 A2 A1 A2 A1 A2 A1 Circuit Diagram (HS5E-DD4) 11 12 41 42 11 12 41 42 11 12 41 42 11 12 41 42 21 22 51 52 21 22 51 52 21 22 51 52 21 22 51 52 Closed (locked) Closed (unlocked) Open Open Closed (unlocked) Door Main Door Monitor Lock Monitor Circuit ➀ ON (closed) OFF (open) OFF (open) OFF (open) OFF (open) (Actuator inserted) (Solenoid OFF) 11−42 (+) (–) A2 A1 HS5E-DD4 Main 11 12 41 42 Main Circuit ➀: ➁ 21 22 52 Circuit ON (closed) OFF (open) OFF (open) OFF (open) OFF (open) Main Circuit ➁: 51 21−52 Solenoid Power A1-A2 (all model) OFF (de-energized) ON (energized) ON (energized) OFF (de-energized) OFF (de-energized) • The above contact configuration shows the status when the actuator is inserted and locked . Note: Actuator can be unlocked manually for confirming the door movement before wiring and energizing, and also for emergency • Main Circuit: Connected to the control circuit of machine drive part, sending interlock signals situation such as power failure . of the protective door . Operation Chracteristics (reference) 0 (Actuator insertion position) • The operation characteristics shown in the chart above are of the 3.3 (Locked position) HS9Z-A51 . For other actuators, add 1 .3 mm . Contacts ON (closed) 5.3 6.9 26.4 (travel in mm) • The operation characteristics show the contact status when the actuator Main Circuit Contacts OFF (open) enters the entry slot of an interlock switch . 42 Contact Configuration HS5E HS5E Miniature Interlock Switches with Solenoid Four-circuit Independent Output - Spring Lock Unlocked with Manual Status 1 Status 2 Status 3 Status 4 Unlocking Key • Door Closed • Door Closed • Door Open • Door Open • Door Closed Interlock Switch Status • Machine ready to • Machine cannot be • Machine cannot be • Machine cannot be • Machine cannot be operate operated operated operated operated • Solenoid de-energized • Solenoid energized • Solenoid energized • Solenoid de-energized • Solenoid de-energized Door Status LOCK UNLOCK LOCK UNLOCK Turn the manual unlock key (Note) (+) (–) (+) (–) (+) (–) (+) (–) A2 A1 A2 A1 A2 A1 A2 A1 Circuit Diagram (HS5E-VA4) 11 12 41 42 11 12 41 42 11 12 41 42 11 12 41 42 23 24 53 54 23 24 53 54 23 24 53 54 23 24 53 54 Closed (locked) Closed (unlocked) Open Open Closed (unlocked) Door Door Monitor Lock Monitor Monitor Circuit (Actuator Inserted) (Solenoid OFF) (door closed) ON (closed) ON (closed) OFF (open) OFF (open) ON (closed) 11−12 (+) (–) Monitor Circuit A2 A1 (door open) OFF (open) OFF (open) ON (closed) ON (closed) OFF (open) 23−24 HS5E- VA4 Monitor Circuit (locked) Monitor Circuit: ON (closed) OFF (open) OFF (open) OFF (open) OFF (open) 11 12 41 42 41−42 Monitor Circuit: 23 24 Monitor Circuit: 53 54 Monitor Circuit (unlocked) OFF (open) ON (closed) ON (closed) ON (closed) ON (closed) 53−54 Monitor Circuit (door closed) ON (closed) ON (closed) OFF (open) OFF (open) ON (closed) 11−12 HS5E-VB4 Monitor Circuit (door open) OFF (open) OFF (open) ON (closed) ON (closed) OFF (open) 23−24 Monitor Circuit: 11 12 41 42 Monitor Circuit Monitor Circuit: 23 24 (locked) ON (closed) OFF (open) OFF (open) OFF (open) OFF (open) Monitor Circuit: 51 52 41−42 Monitor Circuit (locked) ON (closed) OFF (open) OFF (open) OFF (open) OFF (open) 51−52 Monitor Circuit (door closed) ON (closed) ON (closed) OFF (open) OFF (open) ON (closed) 11−12 HS5E-VC4 Monitor Circuit (door closed) ON (closed) ON (closed) OFF (open) OFF (open) ON (closed) 21−22 Monitor Circuit: 11 12 41 42 Monitor Circuit Monitor Circuit: 21 22 (locked) ON (closed) OFF (open) OFF (open) OFF (open) OFF (open) Monitor Circuit: 53 54 41−42 Monitor Circuit (unlocked) OFF (open) ON (closed) ON (closed) ON (closed) ON (closed) 53−54 Monitor Circuit (door closed) ON (closed) ON (closed) OFF (open) OFF (open) ON (closed) 11−12 HS5E-VD4 Monitor Circuit (door closed) ON (closed) ON (closed) OFF (open) OFF (open) ON (closed) 21−22 Monitor Circuit: 11 12 41 42 Monitor Circuit 21 22 (locked) Monitor Circuit: ON (closed) OFF (open) OFF (open) OFF (open) OFF (open) 41−42 Monitor Circuit: 51 52 Monitor Circuit (locked) ON (closed) OFF (open) OFF (open) OFF (open) OFF (open) 51−52 Solenoid Power A1-A2 (all model) OFF (de-energized) ON (energized) ON (energized) OFF (de-energized) OFF (de-energized) • The above contact configuration shows the status when the actuator is inserted and locked . Note: Actuator can be unlocked manually for confirming the door movement before wiring and energizing, and also for • Monitor Circuit: Sends monitoring signals of protective door open/closed status or protective emergency situation such as power failure . door lock/unlock status . Operation Chracteristics (reference) 0 (Actuator insertion position) 3.3 (Locked position) 5.3 6.9 • The operation characteristics shown in the chart above are of the HS9Z-A51 . 26.4 (travel in mm) For other actuators, add 1 .3 mm . Monitor Circuit (door open, NO) • The operation characteristics show the contact status when the actuator enters Contacts ON (closed) Monitor Circuit (door closed, NC) the entry slot of an interlock switch . Monitor Circuit (unlocked, NO) Contacts OFF (open) Monitor Circuit (locked, NC) 43 Contact Configuration HS5E Miniature Interlock Switches with Solenoid Four-circuit Independent Output - Solenoid Lock Unlocked with Manual Status 1 Status 2 Status 3 Status 4 Unlocking Key • Door Closed • Door Closed • Door Closed • Door Open • Door Open Interlock Switch Status • Machine cannot be • Machine ready to • Machine cannot be • Machine cannot be • Machine cannot be operated operate operated operated operated • Solenoid de-energized • Solenoid energized • Solenoid de-energized • Solenoid de-energized • Solenoid energized → energized Door Status LOCK UNLOCK Manual Unlock Status (+) (–) (+) (–) (+) (–) (+) (–) A2 A1 A2 A1 A2 A1 A2 A1 Circuit Diagram (HS5E-VA7Y) 11 12 41 42 11 12 41 42 11 12 41 42 11 12 41 42 23 24 53 54 23 24 53 54 23 24 53 54 23 24 53 54 Closed (locked) Closed (unlocked) Open Open Closed (unlocked) Door Door Monitor Lock Monitor Monitor Circuit (Actuator Inserted) (Solenoid ON) (door closed) ON (closed) ON (closed) OFF (open) OFF (open) ON (closed) 11−12 (+) (–) Monitor Circuit A2 A1 (door open) OFF (open) OFF (open) ON (closed) ON (closed) OFF (open) 23−24 HS5E-VA7Y Monitor Circuit Monitor Circuit: 11 12 41 42 (locked) ON (closed) OFF (open) OFF (open) OFF (open) OFF (open) Monitor Circuit: 23 24 41−42 Monitor Circuit: 53 54 Monitor Circuit (unlocked) OFF (open) ON (closed) ON (closed) ON (closed) ON (closed) 53−54 Monitor Circuit (door closed) ON (closed) ON (closed) OFF (open) OFF (open) ON (closed) 11−12 HS5E-VB7Y Monitor Circuit (door open) OFF (open) OFF (open) ON (closed) ON (closed) OFF (open) 23−24 Monitor Circuit: 11 12 41 42 Monitor Circuit Monitor Circuit: 23 24 (locked) ON (closed) OFF (open) OFF (open) OFF (open) OFF (open) 51 52 Monitor Circuit: 41−42 Monitor Circuit (locked) ON (closed) OFF (open) OFF (open) OFF (open) OFF (open) 51−52 Monitor Circuit (door closed) ON (closed) ON (closed) OFF (open) OFF (open) ON (closed) 11−12 HS5E-VC7Y Monitor Circuit (door closed) ON (closed) ON (closed) OFF (open) OFF (open) ON (closed) 21−22 Monitor Circuit: 11 12 41 42 Monitor Circuit 21 22 Monitor Circuit: (locked) ON (closed) OFF (open) OFF (open) OFF (open) OFF (open) 53 54 Monitor Circuit: 41−42 Monitor Circuit (unlocked) OFF (open) ON (closed) ON (closed) ON (closed) ON (closed) 53−54 Monitor Circuit (door closed) ON (closed) ON (closed) OFF (open) OFF (open) ON (closed) 11−12 HS5E-VD7Y Monitor Circuit (door closed) ON (closed) ON (closed) OFF (open) OFF (open) ON (closed) 21−22 Monitor Circuit: 11 12 41 42 Monitor Circuit 21 22 Monitor Circuit: (locked) ON (closed) OFF (open) OFF (open) OFF (open) OFF (open) Monitor Circuit: 51 52 41−42 Monitor Circuit (locked) ON (closed) OFF (open) OFF (open) OFF (open) OFF (open) 51−52 OFF (de-energized) to ON (energized) Solenoid Power A1-A2 (all model) ON (energized) OFF (de-energized) OFF (de-energized) ON (energized) (Note 2) (Note 1) (Note 2) • The above contact configuration shows the status when the actuator is inserted and locked . Note 1: Do not attempt manual unlocking when the solenoid is energized . • Monitor Circuit: Sends monitoring signals of protective door open/closed status or protective Note 2: Do not energize the solenoid for a long time while the door lock/unlock status . door is open or when the door is unlocked manually . Operation Chracteristics (reference) 0 (Actuator insertion position) 3.3 (Locked position) 5.3 6.9 • The operation characteristics shown in the chart above are of the HS9Z-A51 . 26.4 (travel in mm) For other actuators, add 1 .3 mm . Monitor Circuit (door open, NO) • The operation characteristics show the contact status when the actuator enters Contacts ON (closed) Monitor Circuit (door closed, NC) the entry slot of an interlock switch . Monitor Circuit (unlocked, NO) Contacts OFF (open) Monitor Circuit (locked, NC) 44 Contact Configuration Minimum Radius 260 mm Minimum Radius 190 mm Minimum Radius 140mm Minimum Radius Minimum Radius 170 mm 230 mm Minimum Radius Centers 12 mm: 120 mm Centers 20 mm: 170 mm HS5E HS5E Miniature Interlock Switches with Solenoid Safety Precautions • In order to avoid electric shock or fire, turn power off before • Solenoid lock is locked when energized, and unlocked when installation, removal, wire connection, maintenance, or de-energized . When energization is interrupted due to wire inspection of the interlock switch . disconnection or other failures, the interlock switch may be unlocked causing possible danger to the operators . Solenoid • If relays are used in the circuit between the interlock switch lock must not be used in applications where locking is strictly and the load, consider the danger and use safety relays, required for safety . Perform a risk assessment and determine since welded or sticking contacts of standard relays may whether solenoid lock is appropriate . invalidate the functions of the interlock switch . Perform a risk assessment and establish a safety circuit which satisfies the • When changing the head orientation, disconnect the cable requirement of the safety category . and turn the manual unlock to the UNLOCK position in advance . If the head orientation is changed when the cable • Do not place a PLC in the circuit between the interlock switch is connected and the manual unlock is in the LOCK position, and the load . Safety security can be endangered in the event machines may start to operate, causing danger to the of a malfunction of the PLC . operators . • Do not disassemble or modify the interlock switch, otherwise • When using the four-circuit independent output type as an a breakdown or an accident may occur . input to safety circuit, connect the door monitor circuits (11-12, • Do not install the actuator in a location where the human body 21-22, 31-32) and lock monitor circuits (41-42, 51-52, 61-62) may come in contact . Otherwise injury may occur . in series . Instructions • Regardless of door types, do not use the interlock switch as Minimum Radius of Hinged Door a door stop . Install a mechanical door stop at the end of the • When using the interlock switch for a hinged door, refer to door to protect the interlock switch against excessive force . the minimum radius of doors shown below . For the doors • Do not apply excessive shock to the interlock switch when with small minimum radius, use angle adjustable actuators opening or closing the door . A shock to the interlock switch (HS9Z-A53 or HS9Z-A55) . 2 exceeding 1,000 m/s may cause damage to the interlock Note: Because deviation or dislocation of hinged door may occur in actual switch . applications, make sure of the correct operation before installation . • Prevent foreign objects such as dust and liquids from entering HS9Z-A52 Actuator the interlock switch while connecting a conduit or wiring . • If the operating atmosphere is contaminated, use a protective • When the door hinge is on the extension line of the interlock cover to prevent the entry of foreign objects into the interlock switch surface: switch through the actuator entry slots . • Entry of foreign objects into the interlock switch may affect the mechanism of the interlock switch and cause a breakdown . Interlock Switch Mounting Holes • Plug the unused actuator entry slot using the slot plug supplied with the interlock switch . Door Hinge • Do not store the interlock switches in a dusty, humid, or Door Hinge organic-gas atmosphere . • Use proprietary actuators only . When other actuators are (36.2) (35) used, the interlock switch may be damaged . • Do not modify the actuator, otherwise it will damage the • When the door hinge is on the extension line of the actuator interlock switch . mounting surface: • Do not open the lid of the interlock switch . Loosening the screws may cause damage to the interlock switch . • The actuator retention force is 1400N . Do not apply a load Interlock Switch higher than the rated value . When a higher load is expected, Mounting Holes provide an additional system consisting of another interlock switch without lock (such as the HS5B interlock switch) or a Door Hinge Door Hinge sensor to detect door opening and stop the machine . • Regardless of door types, do not use the interlock switch (41.5) (40.3) as a door lock . Install a separate lock using a latch or other measures . • While the solenoid is energized, the interlock switch HS9Z-A52A Actuator (w/rubber bushings) temperature rises approximately 40°C above the ambient • When the door hinge is on the extension line of the interlock temperature (to approximately 90°C while the ambient switch surface: temperature is 50°C) . To prevent burns, do not touch . If cables come into contact with the interlock switch, use heat-resistant cables . Interlock Switch • Solenoid has polarity . Be sure of the correct polarity when Mounting Holes wiring, otherwise solenoid will be damaged . Do not apply voltage over the rated voltage, otherwise the solenoid will be Door Hinge Door Hinge burnt . • Although the HS9Z-A51A and HS9Z-A52A actuators (w/ (36.2) (35) rubber bushings) alleviate the shock when the actuator enters a slot in the interlock switch, make sure that excessive shock is not applied . If the rubber bushings become deformed or cracked, replace with new ones . 45 (231) (161) (111) Minimum Radius 260mm Minimum Radius Centers 12 mm: 230 mm Centers 20 mm: 310 mm Minimum Radius 80 mm Minimum Radius 50 mm Minimum Radius 50 mm Minimum Radius 70 mm Minimum Radius 70 mm Minimum Radius 50 mm HS5E Miniature Interlock Switches with Solenoid Instructions • When the door hinge is on the extension line of the actuator Mounting Examples mounting surface: Application on Sliding Doors Interlock Switch Mounting Holes Door HS9Z-A51 Actuator Door Hinge Door Hinge HS5E Interlock Switch (48.2) (47) Latch Door Stop Application of Hinged Doors HS9Z-SH5 Sliding Actuator Actuator Angle Adjustment HS9Z-A52 Actuator Door • Using the angle adjustment screw, the actuator angle can be adjusted (refer to the dimensional drawing on page 45) . Adjustable angle: 0 to 20° • The larger the adjusted angle of the actuator, the smaller the applicable radius of the door opening . • After installing the actuator, open the door . Then adjust the actuator so that its edge can be inserted properly into the actuator entry slot of the interlock switch . HS5E • After adjusting the actuator angle, apply Loctite to the Interlock Switch adjustment screw so that the screw will not move . Installing the Head When using the HS9Z-A53 Angle Adjustable Do not use the plastic and metal head of he HS5B interlock (vertical) Actuator switches on the HS5E . The metal heads of the HS5E and • When the door hinge is on the extension line of the interlock HS5B interlock switches look similar . When using these switch surface: 50 mm interlock switches adjacently, ensure that the heads are not • When the door hinge is on the extension line of the actuator interchanged . mounting surface: 80 mm HS5B HS5E Plastic Head Metal Head Metal Head Metal Plastic (silver color) (black ∗ or gray) (gray) black ∗ Door Hinge Door Hinge The HS5E metal head can be distinguished easily with the black (36.2) (56.5) plastic part (HS5E metal head has gray plastic part) . Rotating the Head When using the HS9Z-A55 Angle Adjustable The head of the HS5E can be rotated by removing the four (vertical/horizontal) Actuator screws from the corners of the HS5E head and reinstalling • When the door hinge is on the extension line of the interlock the head in the desired orientation . Before wiring the HS5E, switch surface: 50 mm replace the head if necessary . Before replacing the head, turn Horizontal Swing Vertical Swing the manual unlock to the UNLOCK position using the manual unlock key . When reinstalling the head, make sure that no foreign object enters the interlock switch . Tighten the screws tightly, without leaving space between the head and body, otherwise the interlock switch may malfunction . Recommended tightening torque: 0 .9 to 1 .1 N·m . Door Door Hinge Hinge Factory Setting Head can be rotated. (36.2) (36.2) • When the door hinge is on the extension line of the actuator mounting surface: 70 mm Horizontal Swing Vertical Swing Door Hinge Door Hinge (55.5) (55.5) 46 Interlock Switch Mounting Hole (38) Interlock Switch Mounting Hole (231) Interlock Switch (38) Mounting Hole Interlock Switch (68) Mounting Hole (58) HS5E HS5E Miniature Interlock Switches with Solenoid Instructions Safety Precautions For Manual Unlocking After installing the rear unlocking button, apply Loctite to the Spring lock screw so that the screw does not become loose . The button is The HS5E allows manual unlocking of the actuator to pre- made of glass-reinforced PA66 (66 nylon) . The screw is made check proper door movement before wiring or turning power of iron . Take the compatibility of the plastic material and Loctite on, as well as for emergency use such as a power failure . into consideration . Solenoid lock The solenoid lock interlock switch normally does not need Installing the Rear Unlocking Button Kit the manual unlock . However, only when the interlock switch 1 . Install the connecting rod onto the push rod on the HS5E-L would not release the actuator even though the solenoid is rear unlocking button interlock switch . de-energized, the interlock switch can be unlocked manually . Push Rod 2 . A pin is attached to the connecting Unlock the interlock switch manually only when the solenoid rod . Insert the pin into the hole in the is de-energized . Do not unlock the interlock switch manually when the solenoid is energized . push rod, using pliers . 3 . Pull the connecting rod from the hole in the mounting frame, and turn the Connecting button operating pin to the horizontal Rod HS5E-L position . Interlock Switch Pin Connecting Rod Connecting Rod Orientation LOCK UNLOCK Lock Unlock Lock Unlock Normal Position Manual Unlocking Position Correct Incorrect Pull • When locking or unlocking the interlock switch manually, turn the key fully using the manual unlock key supplied with the Safety Precautions interlock switch . Ensure that the connecting rod is pulled out completely and • Using the interlock switch with the key not fully turned (less than 90°) may cause damage to the interlock switch or it is horizontal to the interlock switch, otherwise the unlocking operation failures (when manually unlocked, the interlock button cannot be installed . switch will keep the main circuit disconnected and the door Note: Frame must be supplied by the user . unlocked) . For the mounting hole layout of interlock switches, see page • Do not apply excessive force to the manual unlock, otherwise 44 . When using the mounting plate HS9Z-SP51, provide a hole the manual unlock will become damaged . for the connecting rod in the plate according to the mounting • Do not leave the manual unlock key attached to the interlock plate mounting hole layout shown on page 46 . switch during operation . This is dangerous because the 4 . Install the unlocking button on the connecting rod by fitting interlock switch can always be unlocked while the machine is the pin to the grooves on the back of the button, and fasten in operation . the base plate on the mounting frame using the screws . Manual Unlocking Key Base Plate Mounting Frame (supplied with the switch) Unlocking Button Button Groove Safety Precautions Before manually unlocking the interlock switch, make sure that the machine has come to a complete stop . Manual unlocking during operation may unlock the interlock switch before the machine stops, and the function of interlock switch with sole- Button Operating Pin noid is lost . Screw Installing the Rear Unlocking Button 5 . After fastening the screws, check if locking and unlocking After installing the interlock switch on the panel, place the rear operations can be performed . unlocking button (supplied with the switch) on the push rod on the back of the interlock switch, and fasten the button using the M3 sems screw . Rear unlocking button can be installed alone when the total thickness of mounting frame and panel is 6 mm or less . When the total thickness of mounting frame, panel, and mounting plate is 23 to 53 mm, use the rear unlocking button kit (HS9Z-FL5*) sold separately . Panel Push Rod Rear Unlocking Button Mounting Screw HS5E-L Interlock Switch 47 HS5E Miniature Interlock Switches with Solenoid Instructions Safety Precautions Recommended Tightening Torque Install the rear unlocking button kit in the correct direction • HS5E interlock switch: 1 .8 to 2 .2 N·m (four M4 screws) as shown below . Do not install the kit in incorrect directions, (Note) otherwise malfunction will be caused . • Rear unlocking button: 0 .5 to 0 .7 N·m • Rear unlocking button kit: 4 .8 to 5 .2 N·m (M5 screw) • Actuators HS9Z-A51: 1 .8 to 2 .2 N·m (two M4 screws) HS9Z-A52: 0 .8 to 1 .2 N·m (two M4 Phillips screws) HS9Z-A51A/A52A: 1 .0 to 1 .5 N·m (two M4 screws) HS9Z-A53: 4 .5 to 5 .5 N·m (two M6 screws) HS9Z-A55: 1 .0 to 1 .5 N·m (two M4 screws) Note: The above recommended tightening torque of the mounting screws Incorrect Correct are the values with hex socket head bolts . When other screws are 2 Do not apply strong force exceeding 100 m/s to the interlock used and tightened to a smaller torque, make sure that the screws do not become loose after mounting . switch while the rear unlocking button is not pressed, otherwise • To avoid unauthorized or unintended removal of the interlock malfunction will be caused . switch and the actuator, it is recommended that the interlock switch and the actuator are installed in an unremovable Manual Unlocking using the Rear manner, for example using special screws or welding the Unlocking Button screws . • The rear unlocking button is used by the operator confined in • When installing the HS9Z-A51A and HS9Z-A52A actuators, a hazardous area for emergent escape . use the washer (supplied with the actuator) on the hinged door, and mount tightly using two M4 screws . Mounting centers: 12 mm (factory setting), adjustable to 20 mm Unlock M4 Screw Unlock Washer Rubber Bushing Rear Unlocking Button Hinged Door M4 Screw Hole Rear Unlocking Button Note: Choose mounting centers of either 12 mm or 20 mm. How to operate • When the rear unlocking button is pressed, the interlock Cables switch is unlocked and the door can be opened . • Do not fasten or loosen the gland at the bottom of the safety • To lock the interlock switch, pull back the button . switch . • When the button remains pressed, the interlock switch cannot • When bending the cable during wiring, make sure that the be locked even if the door is closed, and the main circuit cable radius is kept at 30 mm minimum . remains open . • When wiring, make sure that water or oil does not enter the cable . Safety Precautions • Do not open the lid of the interlock switch . Otherwise the • Install the rear unlocking button in the place where only interlock switch will be damaged . the operator inside the hazardous area can use it . Do not install the button in the place where an operator outside the hazardous area can use it, otherwise the interlock switch can be unlocked during usual machine operation, causing danger . • Operate the rear unlocking button by hand only . Do not operate using a tool or with excessive force . Do not apply Lid force to the button from the direction other than the proper direction, otherwise the button will be damaged . Gland 48 Minimum Radius 30 mm min. (48) HS5E HS5E Miniature Interlock Switches with Solenoid Instructions Wire Identification Wires can be identified by color and a white line printed on the wire . • HS5E-V: Wires of gray and gray/white insulation cannot be used . • HS5E-DD: Wires of brown and brown/white insulation cannot be used . Insulation No . Insulation No . Insulation No . Insulation No . Insulation 4 1 3 6 8 2 7 5 8 7 3 911 1 White 4 Blue 7 Blue/White 10 Pink/White 10 12 6 Dummy 4 Jacket 2 1 5 2 Black 5 Brown/White 8 Orange/White 11 Gray Insulation 3 Brown 6 Orange 9 Pink 12 Gray/White HS5E-V Other Terminal Number Identification • When wiring, the terminal number of each contact can be identified by wire color . • The following table shows the identification of terminal numbers . Model Circuit Diagram Model Circuit Diagram Door Monitor Lock Monitor Door Monitor Lock Monitor (+) (–) White A2 A1 Black (+) (–) Black White A2 A1 11 12 41 42 Main Circuit: Blue Blue/White 23 24 HS5E-A Monitor Circuit: Orange Orange/White 11 12 41 42 Monitor Circuit: Blue Blue/White Pink Pink/White 53 54 Monitor Circuit: Brown Brown/White 23 24 HS5E-VA Monitor Circuit: Orange Orange/White 53 54 Monitor Circuit: Brown Brown/White Blue 11 12 41 42 Blue/White Main Circuit: HS5E-B Orange 23 24 Orange/White 11 12 41 42 Monitor Circuit: Monitor Circuit: Blue Blue/White Pink Pink/White Brown 51 52 Brown/White 23 24 Monitor Circuit: HS5E-VB Monitor Circuit: Orange Orange/White 51 52 Monitor Circuit: Brown Brown/White Blue 11 12 41 42 Main Circuit: Blue/White 21 22 Monitor Circuit: Orange Orange/White 11 12 Blue/White Pink41 42 Pink/White HS5E-C Monitor Circuit: Blue 53 54 Monitor Circuit: Brown Brown/White 21 22 Orange/White HS5E-VC Monitor Circuit: Orange Brown 53 54 Brown/White Monitor Circuit: 11 12 41 42 Main Circuit: Blue Blue/White HS5E-D 21 22 Monitor Circuit: Blue 11 12 Blue/White Pink41 42 Pink/White Monitor Circuit: Orange Orange/White 51 52 Monitor Circuit: Orange 21 22 Orange/White Monitor Circuit: Brown Brown/White HS5E-VD Monitor Circuit: Brown 51 52 Brown/White 11 12 41 42 Main Circuit: Blue Blue/White 21 22 HS5E-F Monitor Circuit: Orange Orange/White • The above contact configuration shows the status when the 31 32 Monitor Circuit: Brown Brown/White actuator is inserted and locked . 11 12 41 42 Main Circuit: Blue Blue/White 21 22 HS5E-G Monitor Circuit: Orange Orange/White 33 34 Monitor Circuit: Brown Brown/White 11 12 41 42 Main Circuit: Blue Blue/White 51 52 HS5E-H Monitor Circuit: Brown Brown/White 61 62 Monitor Circuit: Orange Orange/White 11 12 41 42 Blue/White Main Circuit: Blue Brown 51 52 Brown/White Monitor Circuit: HS5E-J 63 64 Monitor Circuit: Orange Orange/White 11 12 41 42 Main Circuit ➀: Blue Blue/White HS5E-DD 21 22 51 52 Main Circuit ➁: Orange Orange/White • When wiring, cut unnecessary wires such as the dummy insulation (white) and any unused wires . 49
Frequently asked questions
How does Electronics Finder differ from its competitors?

Is there a warranty for the HS9Z-DH5LH?
Which carrier will Electronics Finder use to ship my parts?
Can I buy parts from Electronics Finder if I am outside the USA?
Which payment methods does Electronics Finder accept?
Why buy from GID?

Quality
We are industry veterans who take pride in our work

Protection
Avoid the dangers of risky trading in the gray market

Access
Our network of suppliers is ready and at your disposal

Savings
Maintain legacy systems to prevent costly downtime

Speed
Time is of the essence, and we are respectful of yours
Related Products
AL1 LED Illuminated Pushbuttons And Pilot Lights AL2M-LK1-G
Miniature Switches And Pilot Devices: 16Mm AL6H-LK3-A

Rectangular Lens for Pilot Lights AL6H-LK3-G
Rectangular Lens for Pilot Lights AL6H-LK3-R

Rectangular Lens for Pilot Lights AL6H-LK3-S

Rectangular Lens for Pilot Lights AL6H-LK3-W
Request a Quote

The quote request has been received
Close

Facing challenges or have inquiries? Feel free to contact us!
Call Us +1-469-283-2440
What they say about us
FANTASTIC RESOURCE
One of our top priorities is maintaining our business with precision, and we are constantly looking for affiliates that can help us achieve our goal. With the aid of GID Industrial, our obsolete product management has never been more efficient. They have been a great resource to our company, and have quickly become a go-to supplier on our list!
Bucher Emhart Glass
EXCELLENT SERVICE
With our strict fundamentals and high expectations, we were surprised when we came across GID Industrial and their competitive pricing. When we approached them with our issue, they were incredibly confident in being able to provide us with a seamless solution at the best price for us. GID Industrial quickly understood our needs and provided us with excellent service, as well as fully tested product to ensure what we received would be the right fit for our company.
Fuji
HARD TO FIND A BETTER PROVIDER
Our company provides services to aid in the manufacture of technological products, such as semiconductors and flat panel displays, and often searching for distributors of obsolete product we require can waste time and money. Finding GID Industrial proved to be a great asset to our company, with cost effective solutions and superior knowledge on all of their materials, it’d be hard to find a better provider of obsolete or hard to find products.
Applied Materials
CONSISTENTLY DELIVERS QUALITY SOLUTIONS
Over the years, the equipment used in our company becomes discontinued, but they’re still of great use to us and our customers. Once these products are no longer available through the manufacturer, finding a reliable, quick supplier is a necessity, and luckily for us, GID Industrial has provided the most trustworthy, quality solutions to our obsolete component needs.
Nidec Vamco
TERRIFIC RESOURCE
This company has been a terrific help to us (I work for Trican Well Service) in sourcing the Micron Ram Memory we needed for our Siemens computers. Great service! And great pricing! I know when the product is shipping and when it will arrive, all the way through the ordering process.
Trican Well Service
GO TO SOURCE
When I can't find an obsolete part, I first call GID and they'll come up with my parts every time. Great customer service and follow up as well. Scott emails me from time to time to touch base and see if we're having trouble finding something.....which is often with our 25 yr old equipment.
ConAgra Foods