

 Manufacturers
OMRON AUTOMATION Y92F-91

Description
Controllers MOUNTING BASE
Y92F-91
Part Number
Y92F-91
Price
Request Quote
Manufacturer
OMRON AUTOMATION
Lead Time
Request Quote
Category
Thermal Management » Misc Products
Specifications
Manufacturer
Omron Automation
Manufacturers Part #
Y92F-91
Lead Time
4 Week Lead Time
Industry Aliases
Y92F-91
Sub-Categories
Miscellaneous Tools and Supplies
Factory Pack Quantity
1
Datasheet

Extracted Text
Cam Positioner H8PS CSM_H8PS_DS_E_6_2 This Compact Cam Positioner, Popular for Its Ease-of-use, Now Comes with Even Better Functions. • Compact 8-, 16-, and 32-output Models available that are 1/4- DIN size at 96 x 96 mm. High-speed operation at 1,600 r/ min and high-precision settings to 0.5° ensure widespread application. Highly visible display with backlit negative transmissive LCD. Advance angle compensation function to compensate for output delays. Bank function for multi-product production (8 banks). (H8PS-16@/-32@ models.) Speed display and pulse output. Approved standards: UL/CSA and EMC. Refer to Safety Precautions for All Counters and Safety Precautions on page 18 and 19. Features Models with 8, 16, or 32 Outputs Speed Display and Speed Alarm Output The lineup includes Models with 32 outputs in a compact 1/4-DIN Both the speed (rotations/minutes) and present angular position can size. Using the optional Parallel Input Adapter (Y92C-30) enables be displayed at the same time. Alarm outputs can be produced for expanding to up to 64 outputs for one encoder to support anything both upper and lower speed limits. from a simple positioning application to a large-scale system. 12 7 RUN 8-output Models 16-output Models 32-output Models Present angular position Speed Speed Upper limit CAM STEP 96 mm Lower limit Switchable Upper limit alarm output 96 mm 12 7 Lower limit RUN alarm output Simple Programming Speed Present angular The programming method is designed based on a one key-one CAM STEP position action concept for settings that could not be simpler. Both initial settings and factory adjustments are effort-free. Advance Angle Compensation Function to Compensate for Output Delays Large, Backlit Negative LCDs The advance angle compensation (ADV) function automatically Large LCDs, red for the process value and green for set values, show advances the ON/OFF angle of outputs in proportion to machine a wealth of operation information, making operating status visible at (encoder) speed to compensate for the delay in timing of ON/OFF a glance. operation. ADV values can be set individually for 7 cam outputs. Cam program settings High Speed Up To 1,600 r/min 100° 180° 8° compensation High Precision Up To 0.5° (at 720 Resolution) At high-speed (400 r/min) High-speed, high-precision applications can be easily handled and 92° 172° productivity increased. Pulse Output for Timing Control Bank Function for Multi-product Production The number of pulses per rotation and the pulse output start angle Up to eight different programs can be registered in advance to can be set to enable operations like adjusting timing with a PLC or enable fast and easy switching between products (16/32-output outputting to a rotation meter. Models only). USB Communications for Easy Setting from PLC Pulse output a Computer Optional Support Software can be used to enable programming from Rotation meter a personal computer via USB communications. Programs can be easily copied, saved, printed, and much more. 1 Errors H8PS Model Number Structure ■ Model Number Legend H8PS-@@@@ 1234 1. Number of outputs 2. Panel language 3. Mounting method 4. Output configuration 8: 8 outputs B: English None: Flush mounting None: NPN transistor output 16: 16 outputs F: Surface mounting/ P: PNP transistor output track mounting 32: 32 outputs Ordering Information ■ List of Models Cam Positioner Number of outputs Mounting method Output configuration Bank function Model 8 outputs Flush mounting NPN transistor output No H8PS-8B PNP transistor output H8PS-8BP Surface mounting/ NPN transistor output H8PS-8BF track mounting PNP transistor output H8PS-8BFP 16 outputs Flush mounting NPN transistor output Yes H8PS-16B PNP transistor output H8PS-16BP Surface mounting/ NPN transistor output H8PS-16BF track mounting PNP transistor output H8PS-16BFP 32 outputs Flush mounting NPN transistor output H8PS-32B PNP transistor output H8PS-32BP Surface mounting/ NPN transistor output H8PS-32BF track mounting PNP transistor output H8PS-32BFP Dedicated Absolute Encoder Type Resolution Cable length Model Economy 256 2 m E6CP-AG5C-C 256P/R 2M Standard 256 1 m E6C3-AG5C-C 256P/R 1M 2 m E6C3-AG5C-C 256P/R 2M 360 E6C3-AG5C-C 360P/R 2M 720 E6C3-AG5C-C 720P/R 2M Rigid 256 2 m E6F-AG5C-C 256P/R 2M 360 E6F-AG5C-C 360P/R 2M 720 E6F-AG5C-C 720P/R 2M Accessories (Order Separately) Name Specification Model Discrete Wire Output Cable 2 m Y92S-41-200 Connector-type Output Cable 2 m E5ZE-CBL200 Support Software CD-ROM H8PS-SOFT-V1 Shaft Coupling for the E6CP Axis: 6 mm dia. E69-C06B Shaft Coupling for the E6C3 Axis: 8 mm dia. E69-C08B Shaft Coupling for the E6F Axis: 10 mm dia. E69-C10B Extension Cable (See note.) 5 m (same for E6CP, E6C3, and E6F) E69-DF5 Parallel Input Adapter Two Units can operate in parallel. Y92C-30 Protective Cover --- Y92A-96B Watertight Cover --- Y92A-96N Track Mounting Base --- Y92F-91 Mounting Track 50 cm × 7.3 mm (l × t) PFP-50N 1 m × 7.3 mm (l × t) PFP-100N 1 m × 16 mm (l × t) PFP-100N2 End Plate --- PFP-M Spacer --- PFP-S Note: Ask your OMRON representative about the availability of non-standard lengths. Recommended USB Cables Name Recommended manufacturer Specification Model USB Cable ELECOM CO.Ltd. A-miniB, 2m U2C-MF20BK Note: If you can’t purchase recommended replacement, please purchase commercially available USB cable that attached ferrite core. 2 H8PS Specifications ■ Ratings Item H8PS-@B H8PS-@BF H8PS-@BP H8PS-@BFP Rated supply voltage 24 VDC Operating voltage range 85% to 110% of rated supply voltage Mounting method Flush mounting Surface mounting, Flush mounting Surface mounting, track mounting track mounting Power consumption Approx. 4.5 W at 26.4 VDC for 8-output models Approx. 6.0 W at 26.4 VDC for 16-/32-output models Inputs Encoder input Connections to a dedicated absolute encoder External Input 8-output Models: None inputs signals 16-/32-output Models: Bank inputs 1/2/4, origin input, start input Input type No voltage inputs: ON impedance:1 kΩ max. (Leakage current: approx. 2 mA at 0 Ω) ON residual voltage: 2 V max., OFF impedance: 100 kΩ min., Applied voltage: 30 VDC max. Minimum input signal width: 20 ms Outputs Cam outputs NPN open-collector transistor outputs PNP open-collector transistor outputs RUN output 30 VDC max., 30 VDC max. (26.4 VDC for 16-/32-output Models), 100 mA max. (Do not exceed 1.6 A total for all cam 100 mA max. (Do not exceed 1.6 A total for all cam outputs and the RUN output.), outputs and the RUN output.), residual voltage: 2 VDC max. residual voltage: 2 VDC max. Pulse output NPN open-collector transistor output PNP open-collector transistor output 30 VDC max., 30 VDC max. (26.4 VDC for 16-/32-output Models) 30 mA max., 30 mA max., residual voltage: 0.5 VDC max. residual voltage: 2 VDC max. Number of outputs 8-output Models: 8 cam outputs, 1 RUN output, 1 pulse output 16-output Models: 16 cam outputs, 1 RUN output, 1 pulse output 32-output Models: 32 cam outputs, 1 RUN output, 1 pulse output Number of banks 8 banks (for 16-/32-output Models only) Display method 7-segment, negative transmissive LCD (Main Display: 11 mm (red), Sub-display: 5.5 mm (green)) Memory backup method EEPROM (overwrites: 100000 times min.) that can store data for 10 years min. Ambient operating −10 to 55°C (with no icing or condensation) temperature Storage temperature −25 to 65°C (with no icing or condensation) Ambient humidity 25% to 85% Degree of protection Panel surface: IP40, Rear case: IP20 Case color Light gray (Munsell 5Y7/1) 3 H8PS ■ Characteristics Setting unit 0.5° increments at a resolution of 720, 1° increments at a resolution of 256 or 360 (See note 1.) Number of steps Up to 10 steps can be set for each cam to turn the output ON/OFF 10 times. (See note 2.) Inputs Encoder input Connections to a dedicated absolute encoder • Response rotation speed (in Run/Test Mode) 1600 r/min max. at a resolution of 256 or 360 (1200 r/min max. if ADV function is set for 4 or more cams) (See notes 3 and 4.) 800 r/min max. at a resolution of 720 (600 r/min max. if ADV function is set for 4 or more cams) Includes error data detection Encoder cable extension 256/360 resolution distance 100 m max. at 330 r/min or less 52 m max. at 331 to 1200 r/min (331 to 900 r/min if ADV function is set for 4 or more cams) 12 m max. at 1201 to 1600 r/min (901 to 1200 r/min if ADV function is set for 4 or more cams) 720 resolution 100 m max. at 330 r/min or less 52 m max. at 331 to 600 r/min (331 to 450 r/min if ADV function is set for 4 or more cams) 12 m max. at 601 to 800 r/min (451 to 600 r/min if ADV function is set for 4 or more cams) Output response time 0.3 ms max. Insulation resistance 100 MΩ min. (at 500 VDC) between current-carrying terminals and exposed non-current-carrying metal parts, between all current-carrying parts and the USB connector Dielectric strength 1000 VAC, 50/60 Hz for 1 min between current-carrying terminals and exposed non-current-carrying metal parts 500 VAC, 50/60 Hz for 1 min between current-carrying section and USB connector, and between current- carrying terminals and non-current-carrying metal part of output connector Impulse withstand voltage 1 kV between power terminals 1.5 kV between current-carrying terminals and exposed non-current-carrying metal parts Noise immunity ±480 V between power terminals, ±600 V between input terminals Square-wave noise by noise simulator (pulse width: 100 ns/1 μs, 1-ns rise) Static immunity 8 kV (malfunction), 15 kV (destruction) Vibration Destruction 10 to 55 Hz with 0.75-mm single amplitude each in 3 directions for 2 hours each resistance Malfunction 10 to 55 Hz with 0.5-mm single amplitude each in 3 directions for 10 minutes each 2 Shock Destruction 300 m/s 3 times each in 6 directions resistance 2 Malfunction 200 m/s 3 times each in 6 directions Approved safety standards cULus (Listing): UL508/CSA C22.2 No. 14 EMC (EMI) EN61326 Emission Enclosure: EN55011 Group1 Class A (EMS) EN61326 Immunity ESD: EN61000-4-2: 4 kV contact discharge 8 kV air discharge Immunity RF-interference: EN61000-4-3: 10 V/m (Amplitude-modulated, 80 MHz to 1 GHz) 10 V/m (Pulse-modulated, 900 MHz ±5 MHz) Immunity Conducted Disturbance EN61000-4-6: 10 V (0.15 to 80 MHz) Immunity Burst: EN61000-4-4: 2 kV for power-line 1 kV for I/O signal-line Immunity Surge: EN61000-4-5: 1 kV line to line (power line) 2 kV line to ground (power line) Weight Approx. 300 g (Cam Positioner main unit only) Note: 1. Cam output precision, however, is 2° max. for Encoder with 256 resolution (P/R). 2. Although 32-output Models can have 10 steps set for any one output, there must be no more than 160 steps total set for all cam outputs. 3. The maximum is 1000 r/min when an E6CP-AG5C-C Encoder is connected. 4. ADV stands for Advance Angle Compensation. 4 H8PS ■ Functions Item H8PS-8@ H8PS-16@ H8PS-32@ Encoder rotation direction Encoder data can be set with a DIP switch to forward (CW) or reverse (CCW) direction. switching Encoder origin designation The present display angular The present display angular position can be set to 0° (origin) by using the position can be set to 0° (origin) by origin input terminal or the ORIGIN Key on the front panel. pressing the ORIGIN Key on the Note: All banks use the same origin. front panel. Angle display switch Converts the Absolute Encoder value display from 256 divisions/revolution to 360°/revolution. Rotation display monitor Graphically displays the Encoder rotational angular position. Teaching function Sets the cam output ON/OFF angle based on actual machine (Encoder) operation. Pulse output Outputs a preset number of pulses per Encoder rotation. It also sets the pulse output start angle. Switching the angle and Displays both the present angular position and the number of Encoder revolutions (speed) in Run Mode. speed displays Switches back and forth between the main display showing the present angular position with the sub-display showing the speed and the main display showing the speed with the sub-display showing the present angular position. Bank function --- Enables the entire cam program to be changed at one time by switching banks (0 to 7). The bank that is running can be switched using the bank input terminal or the BANK Key on the front panel. Also enables programs to be copied between banks. Advance angle compensation Automatically advances the ON/OFF angle of cam outputs in proportion to machine (encoder) speed to (ADV) function compensate for the delay in timing of ON/OFF operation. ADV values can be set individually for 7 cam outputs. Speed alarm output A specified cam output can be used as an Encoder speed alarm output. The function can output upper and lower limit speed alarms. All protection function Disables all key and switch operations in Run Mode to prevent incorrect or unauthorized operation. Cam protection function Prohibits program changes at the cam output level. Any cam numbers can be protected. Step number limit Limits the number of steps that can be set per cam output. Prohibits incorrect operations by adding to the program. Output prohibit --- The start input can be turned OFF in Run or Test Mode to prohibit cam output. Note: Use this function carefully for the application because no cam outputs are provided when the start input is turned OFF. Support Software settings --- Programs can be uploaded or downloaded easily by connecting a personal computer to the Cam Positioner using a USB Cable (Recommended USB Cables: ELECOM CO.Ltd. U2C-MF20BK) and the Support Software (H8PS- SOFT-V1, sold separately). 5 H8PS Connections ■ Terminal Arrangement H8PS-8@ (8-output Models) H8PS-16@/-32@ (16-/32-output Models) NPN Output, NPN Output, Encoder Flush Mounting Flush Mounting H8PS-8@ 24 VDC H8PS-16@/-32@ + − 67 8 9 10111213 Alignment markings 910111213 (Rear view) (Rear view) 12345 Alignment markings 1234567 8 + − 24 VDC Encoder NPN Output, NPN Output, Encoder Surface Mounting Surface Mounting H8PS-8@F H8PS-16@F/-32@F 24 VDC + − 67 8 910111213 Alignment markings 910111213 (Front view) (Front view) 12345 Alignment markings 1234567 8 + − 24 VDC Encoder PNP Output, PNP Output, Encoder Flush Mounting Flush Mounting H8PS-8@P H8PS-16@P/-32@P 24 VDC + − 67 8 9 10111213 Alignment markings 9 10111213 (Rear view) (Rear view) Note: The VS terminal 12345 Note: The VS terminal Alignment markings is not internally is not internally connected to 1234567 8 connected to the + − the positive (+) 24 VDC positive (+) power power supply supply terminal. terminal. Encoder PNP Output, PNP Output, Encoder Surface Mounting Surface Mounting H8PS-8@FP 24 VDC H8PS-16@FP/-32@FP + − 67 8 9 10111213 Alignment markings 9 10111213 (Front view) (Front view) Note: The VS terminal 12345 Note: The VS terminal Alignment markings is not internally is not internally connected to the 1234567 8 connected to the + − positive (+) power 24 VDC positive (+) power supply terminal. supply terminal. Encoder Note: For PNP output models, the VS terminal and power supply terminals are not connected internally. 6 Cam 1 Cam 1 Cam 1 Cam 1 Cam 2 Cam 2 Cam 2 Cam 2 Cam 3 Cam 3 Cam 3 Cam 3 Cam 4 Pulse output Pulse output Cam 4 Pulse output Pulse output Cam 4 Cam 4 Cam 5 RUN output RUN output Cam 5 RUN output RUN output Cam 5 Cam 5 Not used Cam 6 Not used Cam 6 Vs (See note.) Vs (See note.) Cam 6 Cam 6 Cam 7 Cam 7 Cam 7 Cam 7 Cam 8 Cam 8 Cam 8 Cam 8 COM COM COM Bank 1 COM Bank 1 Bank 1 Vs (See note.) Bank 2 Bank 1 Vs (See note.) Bank 2 Not used Bank 2 Pulse output Not used Bank 2 Bank 4 Pulse output Bank 4 Pulse output Bank 4 RUN output Origin Pulse output Bank 4 RUN output Origin RUN output Origin RUN output Origin Start Start Start Not used Start Not used Not used Not used Not used Not used Not used Not used H8PS Output Cable Connections (16-/32-output Models Only) Flush Mounting Models Surface Mounting Models Output Connector 1 (CN1) Output Connector 1 (CN1) Output Connector 2 (CN2) (See note.) Output Connector 2 (CN2) (See note.) (Bottom view) (Bottom view) Output Connector Output signals Output Connector 1 (CN1) Cam 1 to Cam 16, COM, Vs Output Connector 2 (CN2) (See note.) Cam 17 to Cam 32, COM, Vs Note: The 16-output Models do not have CN2 Connectors. 1. E5ZE-CBL200 Connector-type Output Cable (Order Separately) Connections H8PS-16@/-32@ E5ZE-CBL200 Connector-type Output Cable (Order Separately) Pin Arrangement of XG4M-2030 Connectors (CN1) (CN2) Output Output Cable 1 Cable 2 1 3 5 7 9 1113151719 246 8 10 12 14 16 18 20 XG4M-2030 MIL Connector (made by OMRON) Output Cable 1 Wiring Table Output Cable 2 Wiring Table Outputs Connector Outputs Connector Outputs Connector Outputs Connector pin No. pin No. pin No. pin No. Cam 1 20 Cam 9 19 Cam 17 20 Cam 25 19 Cam 2 18 Cam 10 17 Cam 18 18 Cam 26 17 Cam 3 16 Cam 11 15 Cam 19 16 Cam 27 15 Cam 4 14 Cam 12 13 Cam 20 14 Cam 28 13 Cam 5 12 Cam 13 11 Cam 21 12 Cam 29 11 Cam 6 10 Cam 14 9 Cam 22 10 Cam 30 9 Cam 7 8 Cam 15 7 Cam 23 8 Cam 31 7 Cam 8 6 Cam 16 5 Cam 24 6 Cam 32 5 COM 4 COM 3 COM 4 COM 3 Vs 2 Vs 1 Vs 2 Vs 1 Note: 1. The COM pins in the output connectors are connected inside the Cam Positioner to the negative terminal of the 24-VDC power supply input. 2. The Vs pins in the output connectors are connected inside the Cam Positioner to the Vs terminal. 3. The Vs pins in the output connectors are not used on models with NPN outputs. 4. The COM pins in output connector 1 and output connector 2 are connected to each other inside the Cam Positioner. The Vs pins in output connector 1 and output connector 2 are also connected to each other inside the Cam Positioner. 7 H8PS Using Connector-Terminal Block Conversion Units H8PS-16@/-32@ Terminal Arrangement of the XW2D-20G6 Connector-Terminal Block Conversion Unit E5ZE-CBL200 Connector-type Output Cable 1 Output Cable 2 Output Cable (Order Separately) (CN1) (CN2) A1 A2 A3 A4 A5 A6 A7 A8 A9 A10 A1 A2 A3 A4 A5 A6 A7 A8 A9 A10 Output Cable 1 Output Cable 2 B1 B2 B3 B4 B5 B6 B7 B8 B9 B10 B1 B2 B3 B4 B5 B6 B7 B8 B9 B10 XW2D-20G6 Connector-Terminal Block Conversion Unit (Order Separately) 2. Y92S-41-200 Discrete Wire Output Cable (Order Separately) Connections H8PS-16@/-32@ Output Cable 1 Wiring Table Outputs Cable Marks Marking Outputs Cable Marks Marking Y92S-41-200 color color color color Discrete Wire Cam 1 Orange ■ Black Cam 9 Orange ■ Red Output Cable (Order Separately) Cam 2 Gray ■ Black Cam 10 Gray ■ Red Cam 3 White ■ Black Cam 11 White ■ Red (CN1) (CN2) Cam 4 Yellow ■ Black Cam 12 Yellow ■ Red Cam 5 Pink ■ Black Cam 13 Pink ■ Red Cam 6 Orange ■ ■ Black Cam 14 Orange ■ ■ Red Cam 7 Gray ■ ■ Black Cam 15 Gray ■ ■ Red Output Cable 1 Output Cable 2 Cam 8 White ■ ■ Black Cam 16 White ■ ■ Red COM Yellow ■ ■ Black COM Yellow ■ ■ Red Vs Pink ■ ■ Black Vs Pink ■ ■ Red Output Cable 2 Wiring Table Outputs Cable Marks Marking Outputs Cable Marks Marking color color color color Cam 17 Orange ■ Black Cam 25 Orange ■ Red Cam 18 Gray ■ Black Cam 26 Gray ■ Red Cam 19 White ■ Black Cam 27 White ■ Red Cam 20 Yellow ■ Black Cam 28 Yellow ■ Red Cam 21 Pink ■ Black Cam 29 Pink ■ Red Cam 22 Orange ■ ■ Black Cam 30 Orange ■ ■ Red Cam 23 Gray ■ ■ Black Cam 31 Gray ■ ■ Red Cam 24 White ■ ■ Black Cam 32 White ■ ■ Red COM Yellow ■ ■ Black COM Yellow ■ ■ Red Vs Pink ■ ■ Black Vs Pink ■ ■ Red 8 Vs Vs COM COM Cam 16 Cam 8 Cam 15 Cam 7 Cam 14 Cam 6 Cam 13 Cam 5 Cam 12 Cam 4 Cam 11 Cam 3 Cam 10 Cam 2 Cam 9 Cam 1 Vs Vs COM COM Cam 32 Cam 24 Cam 31 Cam 23 Cam 30 Cam 22 Cam 29 Cam 21 Cam 28 Cam 20 Cam 27 Cam 19 Cam 26 Cam 18 Cam 25 Cam 17 H8PS ■ Input Connections Only the Encoder inputs are connected with 8-output Models. The inputs are no-voltage (short-circuit or open) inputs. No-voltage Inputs Voltage-output sensors can also be connected. Contact Input Open Collector Connection Examples PLC, sensor, Sensor, etc. etc. H8PS-16@ H8PS-16@ 6 7 8 9 10 11 6 7 8 9 10 11 H8PS-32@ H8PS-32@ H8PS-16@ 6 7 8 9 10 11 Note: Operates when the contact turns ON. H8PS-32@ Note: Operates when the transistor turns ON. Note: Operates when the transistor turns ON. No-voltage Input Signal Levels No-contact inputs Short-circuit level for transistor ON Residual voltage: 2 V max. Impedance when ON: 1 kΩ max. (The leakage current is approx. 2 mA when the impedance is 0 Ω.) Open level for transistor OFF Impedance when OFF: 100 kΩ min. Contact inputs Use a contact that can adequately switch 2mA at 5 V. Note: Use a maximum DC power supply of 30 V. ■ Output Connections Note: Internal circuit damage may result from a short circuit in the load. NPN Output Models PNP Output Models Outputs Vs (See note 2.) Load (See note.) Outputs Load (See note 1.) COM/(−) COM/(−) Note: 1. Always connect a diode to absorb counter-electromotive force when Note: Always connect a diode to absorb connecting an inductive load. counter-electromotive force when 2. The VS terminal and power supply terminals are not connected internally. connecting an inductive load. Item Cam outputs, Pulse output Item Cam outputs, Pulse output RUN output RUN output Output method PNP open collector Output method NPN open collector Dielectric strength 8-output Models: 30 VDC Dielectric strength 30 VDC 16-/32-output Models: 26.4 VDC Rated current 100 mA (See note.) 30 mA Rated current 100 mA (See note.) 30 mA Residual voltage 2 VDC max. 0.5 VDC max. Residual voltage 2 VDC max. Leakage current 100 μA max. 5 μA max. Leakage current 100 μA max. Note: Do not exceed 1.6 A total for all cam outputs and the RUN Note: Do not exceed 1.6 A total for all cam outputs and the RUN output. output. 9 COM Bank 1 Bank 2 Bank 4 Origin Start COM Bank 1 Bank 2 Bank 4 Origin Start COM Bank 1 Bank 2 Bank 4 Origin Start H8PS Operating Mode ■ Functions The H8PS Cam Positioner receives angle signal inputs from the Dedicated Absolute Encoder and outputs the preset ON/OFF angles as cam outputs. Program Examples 1. H8PS-8@ (8-output Models) Cam output Step 0 Step 1 Step 9 (cam number) ON angle OFF angle ON angle OFF angle ON angle OFF angle 145° 90° 135° 225° 270° 315° 20° 90° 135° 180° --- --- 890° 225° 270° 285° 315° 345° 0° 45° 90° 135° 180° 225° 270° 315° 0° 45° Cam output 1 Step 0 Step 1 Step 9 Cam output 2 Step 0 Step 1 Step 1 Step 9 Cam output 8 Step 0 (ON/OFF ratio 1:1) Note 1: The number of pulses per Encoder rotation and the pulse output start angle can be set. Pulse output Note 2: With counterclockwise rotation (359°, 358° (See note 1.) Outputs a preset number of pulses per Encoder rotation. (Default setting: 60 pulses/revolution) ...1°, 0°), step 0 for cam output 1 turns ON at 89° and OFF at 44° at in the diagram. RUN output ON during Run or Test Mode. OFF when an error occurs. 2. H8PS-16@ /-32@ (16-/32-output Models) Cam Program (Bank No. 7) Cam Program (Bank No. 2) Cam Program (Bank No. 1) Cam Program (Bank No. 0) Cam output Step 0 Step 1 Step 9 (cam number) ON angle OFF angle ON angle OFF angle ON angle OFF angle 145° 90° 135° 225° 270° 315° 20° 90° 135° 180° --- --- 32 90° 225° 270° 285° 315° 345° 0° 45° 90° 135° 180° 225° 270° 315° 0° 45° Cam output 1 Step 1 Step 0 Step 9 Cam output 2 Step 0 Step 1 Step 1 Step 9 Cam output 32 Step 0 (ON/OFF ratio 1:1) Note 1: The number of pulses per Encoder rotation and the pulse output start angle can be set. Pulse output Note 2: Be sure to turn ON the start input in Run and (See note 1.) Outputs a preset number of pulses per Encoder rotation. (Default setting: 60 pulses/revolution) Test modes. Otherwise, there will be no outputs (output prohibited), including the cam RUN output outputs, pulse output, and RUN output. ON during Run or Test Mode. OFF when an error occurs. Note 3: With counterclockwise rotation (359°, 358° ...1°, 0°), step 0 for cam output 1 turns ON at Start input 89° and OFF at 44° in the diagram. (See note 2.) Note: The entire cam program can be changed at one time with 16- and 32-output Models with the bank function (banks 0 to 7). For details on the procedure for switching banks, refer to page 29. 10 H8PS Nomenclature ■ Displays Display Details 8-output Models No. Display Description (8) All protect color indication (1) Cam output indicators (1) Orange Lit while cam outputs are ON. (2) PV/SV indicator 1234567 8 PRG (9) Mode indicator (2) Red PV: Lit while the present angular position or speed is displayed in TST main display. RUN SV: Lit while the setting value is displayed in main display. (10) Main display (3) Orange Lit while the start input is ON in Run or Test Mode. (11) Unit indication (4) Rotation display Not lit when an error occurs. monitor (12) 256 indication (4) Orange Displays Encoder present angular position, direction, and speed guidelines. (13) Unit indication (5) Green Displays the bank number that is running in Run or Test Mode and (14) Sub-display the bank number selected in Programming Mode. (6) Green Displays the cam number for the angle setting displayed on sub- CAM (15) ON/OFF STEP (6) Cam No. display display. indication (7) Step No. display (16) ADV indication (7) Green Displays the step number for the angle setting displayed on sub- display. 16-/32-output Models (8) Orange Lit while the All Protection function is enabled. (9) Orange The indicator for the selected mode is lit. (8) All protect PRG: Programming Mode indication (1) Cam output indicators TST: Test Mode RUN: Run Mode (2) PV/SV indicator (9) Mode indicator 1234567 8 910 PRG 11 12 13 14 15 16 17 18 19 20 TST (10) Red Displays the present angular position or the speed and settings 21 22 23 24 25 26 27 28 29 30 RUN being made. (3) Start input 31 32 (10) Main display (11) Red Displays units for the angle or the speed displayed on main display. indication (11) Unit indication (4) Rotation display (12) Red Lit while using an Encoder with a resolution of 256 if 256° display is monitor selected. (12) 256 indication (13) Green Displays units for the angle or the speed displayed on sub-display. (13) Unit indication (5) Bank No. display (14) Green Displays the speed or the ON/OFF angle settings. (14) Sub-display (15) Green Indicates whether main display displays the ON or OFF angle STEP setting. CAM (15) ON/OFF (6) Cam No. display indication (16) Green Lit while setting the Advance Angle Compensation (ADV) Function. (7) Step No. display (16) ADV indication ■ Operation Keys Operation Key Details 8-output Models No. Description CHECK 1 Displays program details in Run Mode. 1. CHECK key 2 Selects the cam number with Keys. 3 CAM Selects the step number with Keys. 2. CAM keys 4 Selects the bank number. STEP 5 Selects the ON angle, or OFF angle 3. STEP keys 6 Writes the set data to memory. CAM STEP 7 11. ADV key Changes the angle or other setting value with Keys. 8 Connects the Cam Positioner to a personal computer via USB cable (order ON OFF 12. Mode switch ADV separately) for programming with the Support Software (order separately). PRGM 5. ON/OFF key TCH TEST ANGLE MAN WRITE 9 Moves to the screen for clearing settings 13. Programming RUN 6. WRITE key mode switch CW 10 Designates the current angle of the machine (Encoder) as the origin (0°). ANG 1234 3 4 PLS/R DSPL ORIGIN CLEAR ON ON 256 256 ON 7. ANGLE keys ON OFF 256 360 11 Programming or Test Mode:Press to shift to the ADV function setting 14. Rotation direction OFF OFF ON 360 360 screen. OFF OFF 720 360 switch CCW 9. CLEAR key DO NOT USE. Programming Mode: Press and hold at least 3 s to shift to the Function 15. Encoder resolution Setting Mode. 10. ORIGIN key switch Run Mode: Press and hold at least 5 s to enable/disable the All Protection function. 16-/32-output Models 12 Switches modes. Programming Mode (PRGM): Used to write cam programs, set the ADV function, CHECK etc. 1. CHECK key Test Mode (TEST): Used to modify settings while the Encoder is running. Run Mode (RUN): Used for normal operation and to check the cam CAM program. 2. CAM keys 13 Select the method used for programming cams. Teaching: ON/OFF Angles can be set based on actual machine (Encoder) STEP operation. 3. STEP keys Manual: ANGLE Keys can be used to set ON/OFF angles. CAM STEP 14 Sets the H8PS rotation direction (rotation display monitor, etc.) to the 11. ADV key 4. BANK key machine (Encoder) rotation direction. ON OFF 12. Mode switch BANK ADV 15 Sets the resolution of the connected Encoder. PRGM 5. ON/OFF key Also sets the unit for angle display when using an Encoder with a TCH TEST ANGLE WRITE resolution of 256. RUN MAN 13. Programming 6. WRITE key CW ANG mode switch 1234 3 4 PLS/R DSPL CLEAR ON ON 256 256 ORIGIN 7. ANGLE keys ON ON OFF 256 360 14. Rotation direction OFF OFF ON 360 360 OFF OFF 720 360 8. USB connector switch CCW DO NOT USE. 9. CLEAR key 15. Encoder resolution 10. ORIGIN key switch 11 H8PS Dimensions Note: All units are in millimeters unless otherwise indicated. ■ Main Unit Cam Positioners 15.2 Panel Cutout 21.6 Flush Mounting Models M3.5 terminal screw (according to DIN 43700) H8PS-8B@ (8-output Models) +0.8 92 0 (14.6) 52.9 +0.8 92 0 12 96 46 Note: Mounting panel thickness must be 1 to 96 91.8 × 91.8 5 mm. Flush mounting 14.6 52.9 α (14.6) 52.9 H8PS-16B@ (16-output Models) 12 96 46 H8PS-32B@ (32-output Models) 11 dia. 96 91.8 × 91.8 Mounting screws (2 included) (M4 x 12) Mounting bracket (included) Mounting panel 52.3 + α (1 to 5 mm) Note: An 8-output Model is shown in the above diagrams. The Encoder is connected from the bottom with 16-/32-output M3.5 terminal screw Models. 21.6 15.2 Terminal cover Mounting holes Surface Mounting Models M3.5 terminal screw H8PS-8BF@ (8-output Models) 0.2 81.8± (60.6) 58 46 22.9 96 115.2±0.3 96 91.8 × 91.8 121.2 Four, M4 tap holes 16 Surface Track 90 Mounting Mounting (60.6) H8PS-16BF@ (16-output Models) 74.4 58 60.6 (See note 1.) 46 H8PS-32BF@ (32-output Models) 96 16 96 91.8 × 91.8 DIN Track 121.2 DIN Track Mounting Base Y92F-91 16 16 (Order Separately) 22.9 90 Note: 1. These dimensions vary with the kind of DIN track (reference value). 2. An 8-output Model is shown in the above diagrams. The Encoder is connected from the bottom with 16-/ M3.5 terminal screw Terminal cover 32-output Models. 12 H8PS Encoder Connecting Direction H8PS-8B@ H8PS-8BF@ H8PS-16B@ H8PS-16BF@ H8PS-32B@ H8PS-32BF@ Encoder Encoder Output cable Encoder Output cable Encoder ■ Accessories (Order Separately) Panel Surface Mounting Parallel Input Adapters Front Y92C-30 M4 screw (included) This Adapter enables two H8PS Cam Positioners to share signals from an Encoder. Note: H8PS has been improved in 2004 April. Do not mix old and new model with Y92C-30. 1 74± When you use 2 x H8PS, please use by "Old & Old" or "New & New" models. Two, M4 tap holes 36 Panel Back Mounting Back M4 nut (included) M4 screw (included) Connected to the H8PS. Connected to the H8PS. 1 74± Y92C-30 Two, 4.3 dia. holes 36 From the Dedicated Absolute Encoder Use the cable marked with a triangle when connecting only one H8PS Cam Positioner to the Parallel Input Adapter. 9 47 1,030 40.4 6.5 15 37 8.5 dia. 17 dia. 26 89 60 24 R6.5 36 14 dia. 11.3 13 Y92A-96N Y92A-96N CAM STEP CAM STEP CHECK CAM STEP CHECK CAM STEP H8PS ■ Accessories (Order Separately) Panel Cutout Watertight Cover Cover dimensions 21.9 (2) +0.8 Y92A-96N 92 0 +0.8 131.7 92 0 69.3 Use for flush mounting when waterproofing is required. The Y96A-96N conforms to IP66 and 115.6 28.9 NEMA4 (for indoor use) standards for waterproofing. The operating environment may cause the waterproof packing to deteriorate, shrink, or harden. Therefore, it is recommended that the packing be replaced regularly. DIN Track Mounting Base Protective Cover Y92F-91 Y92A-96B A hardened Y92A-96B Protective Cover is available. Use it for the following: To protect the front panel from dust and dirt. To prevents the set value from being altered due to accidental contact with the keys or switches. Connector-type Output Cable Discrete Wire Output Cable Y92S-41-200 E5ZE-CBL200 Cable length: 2 m Cable length: 2 m Mounting Track PFP-100N PFP-100N2 PFP-50N 0.15 7.3± 16 4.5 4.5 0.3 0.15 35± 27± 0.3 35± 27 24 29.2 15 25 25 25 25 15 (5)* 1 10 10 15 25 25 25 25 15 1 1.5 1,000 (500)* 10 10 * The numbers in parentheses () are dimensions for the PFP-50N. 1,000 End Plate Spacer 16 PFP-M PFP-S 10 5 12 6.2 1.8 M4 x 8 pan-head 34.8 1 screw 44.3 50 35.5 35.3 1.8 11.5 10 1.3 16.5 M4 spring washer 4.8 14 H8PS E6CP-A/E6C3-A/E6F-A Rotary Encoders (Absolute) Combining this Encoder with an H8PS Cam Positioner enables high-precision detection of the operation timing of various automatic machines. The E6CP-A is a low-cost, money-saving Encoder. The standard E6C3-A is well suited to environments subject to water and oil. The standard E6F-A is a rigid type that is compatible with high shaft-tolerance applications as well as environments subject to water and oil. Note: Refer to the relevant datasheet for details. Ratings and Characteristics Item E6CP-AG5C-C E6C3-AG5C-C E6F-AG5C-C Rated supply voltage 12 VDC −10% to 24 VDC +15%, ripple (p-p) 5% max. Current consumption 70 mA max. 60 mA max. (See note 1.) Resolution (pulses 256 (8-bit) 256 (8-bit), 360 (9-bit), or 720 (10-bit) per rotation) Output code Gray binary Output configuration NPN open-collector output Output capacity Applied voltage: 28 VDC max. Applied voltage: 30 VDC max. Sink current: 16 mA max. Sink current: 35 mA max. Residual voltage:0.4 V max. Residual voltage:0.4 V max. (sink current at 16 mA) (sink current at 35 mA) Logic Negative logic (H = 0, L = 1) Accuracy Within ±1° Rotation direction Clockwise (viewed from the shaft) for output code increment Rise and fall times of 1.0 μs max. (control output voltage: 16 V; load 1.0 μs max. (control output voltage: 5 V; load resistance: 1 kΩ; output cord: 2 m max.) output resistance: 1 kΩ; output cord: 2 m max.) Starting torque 0.98 m N·m max. 10 m N·m max. (at room temperature), 9.8 m N·m max. (at room temperature), 30 m N·m max. (at low temperature) 14.7 m N·m max. (at low temperature) −6 2 −6 2 −6 2 Moment of inertia 1 × 10 kg·m max. 2.3 × 10 kg·m max. 1.5 × 10 kg·m max. Radial Shaft-load 29.4 N 80 N 120 N tolerance Thrust 19.6 N 50 N Max. permissible 1000 r/min 5000 r/min rotation Ambient temperature −10 to 55°C (with no icing) −10 to 70°C (with no icing) Storage temperature −25 to 85°C (with no icing) −25 to 80°C (with no icing) Ambient humidity 35% to 85% (with no condensation) Degree of protection IEC standard IP50 IEC standard IP65 (JEM standard IP65f) (See IEC standard IP65 (JEM standard IP65f) note 2.) Insulation resistance 200 MΩ min. (at 500 VDC) between charged parts and the case Dielectric strength 500 VAC, 50/60 Hz for 1 min between charged parts and the case Vibration resistance Destruction: Destruction: Destruction: 10 to 55 Hz,1.5-mm double amplitude for 2 hr 10 to 500 Hz, 2-mm double amplitude, 150 m/ 10 to 500 Hz,1.5-mm double amplitude 3 2 each in X, Y, and Z directions s 3 times each in X, Y, and Z directions, 11- times each in X, Y, and Z directions, 11-min min sweep time sweep time 2 Shock resistance Destruction: 1000 m/s 3 times each in X, Y, and Z directions Weight Approx. 200 g (with 2-m cord) Approx. 300 g (with 1-m cord) Approx. 500 g (with 2-m cord) Datasheet Cat. No. --- F058 E283 Note: 1. The following inrush currents flow when the power is turned ON. E6CP-AG5C-C: Approx. 8 A (time: approx. 0.3 ms), E6C3-AG5C-C: Approx. 6 A (time: approx. 0.8 ms), E6F-AG5C-C: Approx. 9 A (time: approx. 5 μs) 2. JEM1030: Applicable as of 1991 15 H8PS Dimensions Note: All units are in millimeters unless otherwise indicated. 10 E6CP-AG5C-C 5 50 8 3 45° 45° 1 0 56 dia. 25 dia. 50 dia. −0.2 −0.008 6 dia. −0.020 Note 1: Round, vinyl-insulated cable 2,000 38 dia. (See note 2.) Four, M4 holes Note: Order the E69-C06B with 10 cores (external (See note 1.) (depth: 10) dia.: 6, cross-sectional 2 Coupling separately. area: 0.18 mm , insulation: 16.9 dia. 1.0 mm dia.), standard length: 2 m Note 2: Connector to the H8PS 40 37 Cam Positioner. Accessory Panel Bracket Mounting Diagram Mounting Bracket (Included) 2 5.5 dia. holes 120° 25 dia. (18)16 9 120° 120° +0.1 8 3.1 0 Two, C1 16 (5.1) 68±0.2 dia. Three, M5 E6C3-AG5C-C (58) 20 38 D cut: Phase-Z position (range: ±15°) (15) 5 120°±0.1 10 40±0.1 dia. 1 +0 8 dia. −0.018 12 dia. 1 +0 30 dia. −0.021 50 dia. Three, M4 holes (depth: 5) 6 120°±0.1 8.8 Note: Order the E69-C08B 10 6 37 Coupling separately. Oil-resistant, shield PVC-insulated cable with 12 cores (external dia.: 6, 2 cross-sectional area: 0.2 mm , insulation: 1.1 mm dia.), standard length: 1 m or 2 m (85) E6F-AG5C-C 60 20 5 Four, M3 holes (depth: 6) 3 3 15 24 dia. 48 dia. 54 dia. 1 0 60 dia. 40 dia. −0.025 0 10 dia. −0.015 Bearings Note 1: Round, shielded vinyl-insulated cable 14 max. Note: Order the E69-C10B with 12 cores (external dia.: 6, 2 cross-sectional area: 0.2 mm , (See note 2.) Coupling separately. (See note 1.) insulation: 1.1 mm dia.), 42.5 standard length: 2 m 16.9 dia. 17 Note 2: Connector to the H8PS Cam Positioner 2,000 37 Accessory Panel Bracket Mounting Diagram Mounting Bracket (included) 2 5.5 dia. holes 120° (18)16 9 40 dia. 120° 120° + 0.1 8 3.1 0 Two, C1 16 (5.1) 72±0.2 dia. Three, M5 16 H8PS Accessories (Order Separately) E69-C06B Shaft Coupling (for the E6CP) E69-C08B Shaft Coupling (for the E6C3) E69-C10B Shaft Coupling (for the E6F) 26.2 23.6 22 6.8 6.8 Four, M4 Hexagon 5.5 5.5 Four, M4 Hexagon 7.1 (12) 7.1 (11) socket-head setscrews Four, M3 Hexagon socket-head setscrews 3.5 3.5 3.6 (19) 3.6 2.8 socket-head setscrews 2.8 (16.4) 8H8 dia. 8H8 dia.19 dia. 6H8 dia.15 dia. 10H8 dia.22 dia. Note: The material is fiber-glass-reinforced Note: The material is fiber-glass-reinforced Note: The material is fiber-glass-reinforced polybutylene terephthalate resin (PBT). polybutylene terephthalate resin (PBT). polybutylene terephthalate resin (PBT). E69-DF5 Extension Cable 34.6 5,000 37 16.9 dia. 16.9 dia. (See note 1.) (See note 2.) (See note 3.) Note 1: E6F-AG5C-C, E6CP-AG5C-C, and E6C3-AG5C-C Connectors for the H8PS. 2 Note 2: 6-dia., 12-core shielded cable (cross-sectional area: 0.2 mm , insulation: 1.1 mm dia.), standard length: 5 m Note 3: Connected to the H8PS Cam Positioner. Note: Refer to Characteristics on page 4 for the maximum cable length. The following models are also available: E69-DF10 (10 m), E69-DF15 (15 m), E69-DF20 (20 m), and E69-DF98 (98 m). Safety Precautions for Encoders ■ Precautions for Correct Use Do not subject the E6CP Encoder to oil or water. Mounting Procedure The Encoder consists of high-precision components. Handle it with Do not secure the utmost care and do not drop it, otherwise malfunctioning may 1 Insert the shaft into the Coupling. Coupling and shaft result. with screws at this When connecting the shaft of the Encoder with a chain timing belt time. or gear, connect the chain timing belt or gear with the shaft via a bearing or coupling as shown in the following diagram. 2 Secure the Encoder. Chain sprocket Coupling Bearings Rotary Encoder Refer to the table for Coupling Maximum insertion length the maximum insertion lengths of E69-C06B 5.5 mm the shaft into the E69-C08B 6.8 mm Coupling. E69-C10B 7.1 mm 3 Secure the Coupling. If the decentering or declination value exceeds the tolerance, an excessive load imposed on the shaft may damage or shorten the life of the Encoder. Coupling Tightening torque Do not place excessive loads on the shaft if the shaft is connected to a gear. E69-C06B 0.25 N·m The tightening torque must not exceed the value given in the table E69-C08B 0.44 N·m at the right when the Rotary Encoder is mounted with screws. E69-C10B 0.44 N·m Do not pull wires with a force greater than 29.4 N while the Rotary Encoder is secured and wired. Be sure to turn 4 Connect the power and I/O lines. OFF the Encoder Rotary Encoder before connecting the lines. 5 Turn ON the power and check the outputs. 29.4 N max. Fastening plate Cord Do not subject the shaft to shock. Therefore, do not strike the shaft or coupling with a hammer when inserting the shaft into the coupling. Make sure there is no foreign matter in the Connector before connecting it to the Encoder. 17 H8PS Safety Precautions for Cam Positioners Refer to Safety Precautions for All Counters. ■ Precautions for Safe Use !CAUTION Observe the following items to ensure the safe use of this product. Tighten terminal screws to a torque of 0.80 N·m so that they do not become loose. Environmental Precautions Minor fires or malfunction may occasionally occur. Store the H8PS within specified ratings. If the H8PS has been For 16- and 32-output Models, leave the protective label stored at temperatures −10°C or lower, let it stand for 3 hours or attached to the H8PS when wiring. Removing the label longer at room temperature before turning ON the power supply. before wiring may occasionally result in fire if foreign Use the H8PS within the specified ratings for operating temperature matter enters the Unit. and humidity. Remove the label after the completion of wiring to ensure Do not operate the H8PS in locations subject to sudden or extreme proper heat dissipation. Leaving the label attached may changes in temperature, or locations where high humidity may occasionally result in fire. result in condensation. Do not disassemble, modify, or repair the H8PS or touch Do not use the H8PS in locations subject to vibrations or shock. any of the internal parts. Otherwise, minor electric shock, Extended use in such locations may result in damage due to stress. fire, or malfunction may occasionally occur. Do not use the H8PS in locations subject to excessive dust, corrosive gas, or direct sunlight. Do no allow metal fragments, lead wire scraps, or chips from processing during installation to fall inside the H8PS. Install the H8PS well away from any sources of static electricity, Otherwise, minor electric shock, fire, or malfunction may such as pipes transporting molding materials, powders, or liquids. occasionally occur. The H8PS is not waterproof or oil resistant. Do not touch the terminals when power is being supplied. Do not use it in locations subject to water or oil. For Surface-mounting H8PS, always connect the terminal The life expectancy of internal components may be reduced if the cover for after completing wiring. Otherwise, minor injury H8PS is mounted side-by-side. due to electric shock may occasionally occur. Do not use organic solvents (such as paint thinner or benzine), strong alkaline, or strong acids because they will damage the external finish. Usage Precautions Install a switch or circuit breaker that allows the operator to immediately turn OFF the power, and label it to clearly indicate its function. Pay careful attention to polarity to avoid wrong connections when wiring terminals. Do not connect more than two crimp terminals to the same terminal. Use the specified wires for wiring. Applicable Wires 2 AWG24 to AWG18 (cross-sectional area of 0.208 to 0.832 mm ) Solid or twisted wires of copper Do not connect loads that exceed the rated output current. The output elements may be destroyed, possibly resulting in short- circuit or open-circuit faults. Always connect a diode to protect against counterelectromotive force when using an inductive load. Counterelectromotive force may destroy output elements, possibly resulting in short-circuit or open-circuit faults. Use the specified cables to connect outputs. Do not install input lines in the same duct or conduit as power supply or other high-voltage lines. Doing so may result in malfunction due to noise. Separate the input lines from high- voltage lines. Internal elements may be destroyed if a voltage outside the rated voltage is applied. Maintain voltage fluctuations in the power supply within the specified range. Use a switch, relay, or other contact so that the rated power supply voltage will be reached within 0.1 s. If the power supply voltage is not reached quickly enough, the H8PS may malfunction or outputs may be unstable. Do not turn OFF the power supply when changing or deleting settings. The contents of the EEPROM may be corrupted. 18 H8PS Do not subject H8PS Connectors (outputs, Encoder) to more than ■ Precautions for Correct Use 30 N of force. A cam output will remain ON if the set angles for two steps overlap Confirm the waveform of the power supply circuit and install a for the same cam number. surge absorber. Surge or noise applied to the power supply may destroy internal elements or cause malfunctions. Step 1: 120° ON → 170° OFF Step 2: 150° ON → 210° OFF Switch the power supply circuit with a device rated at 3.5 A or higher. ON Inrush current of approximately 3.5 A will flow for a short period of OFF time when the power supply is turned ON. The H8PS may not start 120° 150° 170° 210° if the capacity of the power supply is not sufficient. Be sure to use a A step will produce no output if the ON and OFF angle for the step power supply with sufficient capacity. are the same. EEPROM is used as memory when the power is interrupted. The The RUN output does not turn ON during programming. write life of the EEPROM is 100000 writes. The EEPROM is written RUN/TEST when settings are changed or deleted or when the resolution is Mode Switch changed. PRGM Make sure that all settings are appropriate for the application. ON RUN output Unexpected operation resulting in property damage or accidents OFF may occur if the settings are not appropriate. Note: The RUN output turns ON with the timing shown in the diagram, Connect all negative (−) terminals, COM terminals, and Vs but it remains OFF when an error occurs. Thus, you can use the terminals. output as a timing signal during operation, including trial When using the Y92C-30 Parallel Input Adapter for parallel operation. operation, do not connect more than two H8PS Cam Positioners to Input signals may be accepted, not accepted, or unstable for the the same Encoder. following times when the power supply is turned ON or OFF. Set the system to allow leeway in the timing of input signals. Approx. 1 second is required from the time the power supply is turned ON until outputs are made. Refer to the Operation Manual (Cat. No. Z199) for information on other timing. ON Power supply OFF 5 ms 0 to 1 s 0 to 1.3 s Input status Unstable Accepted UnstableNot accepted When using 16-/32-output Modules, the operation timing of the outputs will be as shown below in relation to the ON/OFF timing of the start input. Refer to Bank Functions (F7/F8/F9) on page 29 when switching banks. ON Start input OFF 225 ms max. 225 ms max. Cam outputs Output OFF Output possible Output OFF RUN output Refer to the following manual for precautions in using the Cam Positioner and other information required for operation: H8PS Cam Positioner Operation Manual (Cat. No. Z199) 19 H8PS Operating Procedures ■ Flow of Operation Initial Settings Setting Resolution and The Encoder resolution and rotation direction is set on a DIP switch. Rotation Direction ➾ For details on the setting methods, refer to page 21. The Encoder is mounted to the machine and the origin for operation is determined. Setting the Origin ➾ For details on the setting methods, refer to page 21. Parameters can be set in Function Setting Mode to perform more advanced operations. Advanced Setting Functions ➾ For details, refer to page 26 Advanced Functions. function Programming Cams (Programming Mode) There are three methods that can be used to set or change ON/OFF angles (i.e., cam programming). Setting ON/OFF Angles • Using the ANGLE Keys (Manual Mode) • Actually turning the Encoder (Teaching Mode) • Setting from personal computer using Support Software (order separately) ➾ For details on the setting methods, refer to pages 22 to 23. Advance angle compensation (ADV) function can be set if required. Advanced Setting the ADV Function ➾ For details on the setting methods, refer to page 27. function The machine is operated and outputs are actually made to check the timing of operation. Checking Timing (Test Mode) If the timing of operation is not correct, it can be changed. ➾ For details, refer to page 23. Operation is started. Operation (Run Mode) ➾ For details, refer to page 24. The ON/OFF angles that have been set can be checked. Checking ON/OFF Angle Settings ➾ For details, refer to page 24. Deletes settings. There are two methods that can be used to delete settings. Clearing Settings • Clearing all programs (deletes all programming) • Clearing individual steps, cams, and banks ➾ For details, refer to page 25. ■ Settings for Basic Functions Programming Mode Changing the Mode Used to write cam programs, set the advance angle compensation function, etc. PRG All outputs will remain OFF. PRG TST Programming Mode RUN Changed with the mode switch. Test Mode PRG Used to write cam programs, set the advance angle compensation TST TST Test Mode RUN function, and perform other operations while actually turning ON outputs to confirm operation timing. This mode is also used to adjust Changed with the mode switch. settings during operation. PRG TST Run Mode RUN RUN Run Mode Used for normal operation. Settings, such as writing cam programs and setting the advance angle compensation function, cannot be ADV Key ON/OFF Key performed. 5 s min. 1 s min. All Protection Switching the Angle and Speed Display Disables all keys Main Display: Angle and switches. Sub-display: Speed will light when the all ↓ ↑ protection function is Main Display: Speed enabled. Sub-display: Angle ➾ Refer to page 24. ➾ Refer to page 24. 20 H8PS Setting Resolution and Rotation Setting the Origin Direction The origin of the Cam Positioner is set to match the origin of the machine (Encoder). The same origin is used for all banks. One of three resolutions can be selected for the Encoder connected (The bank function is supported only for 16-/32-output models.) to the H8PS: 256, 360, or 720. The resolution and display angle are set here. Example: Setting the Present Angular Position of 150° to 0° Turn OFF the power supply. Change the mode. Set the mode switch to PRGM. Set the display angle and the Set the programming Set the programming mode switch to TCH. mode switch. Encoder resolution. Open the front cover at the lower part of the H8PS and Mode Programming mode set pins 3 and 4 on the DIP switch. PRG TCH TST CW MAN RUN Display 1234 3 4 Resolution angle ON ON 256 256 ON ON OFF 256 360 (See note 2.) OFF OFF ON 360 360 Set the machine to its origin. OFF OFF 720 360 CCW Not used. Turn the machine (Encoder) to the position of the desired origin (150° in this example). Note 1: Default settings are shown in reverse type. PRG Note 2: When using an Encoder with a resolution of 256, displaying 360° directly is not possible. The H8PS thus provides a convenient setting that enables converting the display and settings to 360° when using an Encoder with a resolution of 256. When using a 360° display, however, some angles will not be displayed. Check the rotation direction of the machine (Encoder). Turn ON the power supply. CAM STEP Turn the Encoder in the actual direction of operation and confirm that the rotation display monitor turns clockwise. Specify the origin. If the monitor turns counterclockwise, turn OFF the power supply and change pin 1 on the DIP switch to CCW. Press the ORIGIN Key. (See note.) In approx. 1 s, the present angular position display will change to 0° and the previous display will return. CW Rotation Display Monitor (See note.) Display 1234 3 4 Resolution PRG angle ON ON 256 256 ON ON OFF 256 360 OFF OFF ON 360 360 OFF OFF 720 360 CCW Not used. Note: Default setting. STEP CAM Note: With 16-/32-output models, the origin input from the terminal block can be turned ON to Connect the machine (Encoder) and turn ON specify the origin. the power supply. End End of preparations. Note: Changes to DIP switch settings are enabled when the power is turned ON. 21 H8PS Setting ON/OFF Angles in Manual Mode Setting ON/OFF Angles in Teaching ON/OFF angles can be set manually using the ANGLE Keys Mode on the front of the Cam Positioner. ON/OFF angles can be set based on actual machine (Encoder) operation. Example: Setting Step 1 of Cam No. 2 to Turn ON at 28° and Turn OFF at 51° Example: Setting the ON/OFF Angles by Teaching Step 2 of Cam No. 3 Change the mode. Set the mode switch to PRGM. Change the mode. Set the mode switch to PRGM. Set the programming Set the programming mode switch to MAN. mode switch. Set the programming Set the programming mode switch to TCH. mode switch. Mode Programming mode Mode Programming mode PRGM TCH TEST MAN PRGM RUN TCH TEST MAN RUN Banks can be specified only for Set the bank No. 16-/32-output models. Banks can be specified only for Set the bank No. • Press the BANK Key to specify the bank number and 16-/32-output models. then press the WRITE Key. • Press the BANK Key to specify the bank number and then press the WRITE Key. Set the cam and step No. Set the cam and step No. • Press the CAM Keys to specify cam No. 2. • Press the STEP Keys to specify step No. 1. • Press the CAM Keys to specify cam No. 3. • Press the STEP Keys to specify step No. 2. PRG TST CAM STEP CAM STEP Set the ON angle. Set the ON angle. • Press the K ON↑ ↓OFF ey to flash the . "ON↑" • Press the ANGLE Keys to set an angle of 28 ON↑ ↓OFF "ON↑" • Press the Key to flash the . and then press the WRITE Key. • Turn the machine (Encoder) to the desired ON angle. (195° in this example) PRG • Press the WRITE Key. TST CAM STEP Set the OFF angle. STEP CAM • Press the K ON↑ ↓OFF ey to flash the . "↓OFF" • Press the ANGLE Keys to set an angle of 51 and then Set the OFF angle. press the WRITE Key. "↓OFF" • Press the Key to flash the . ON↑ ↓OFF PRG • Turn the machine (Encoder) to the desired OFF angle. (278° in this example) • Press the WRITE Key. TST CAM STEP End Note: Pressing the or Key continually will automatically increment or decrement the value. Pressing the other key during automatic increment CAM STEP or decrement will increase the speed. End 22 H8PS Setting ON/OFF Angles Using Support Checking Timing (Test Mode) Software Testing Operation With 16-/32-output models, programs can be uploaded or Operation can be tested to check operation timing. downloaded easily with the optional Support Software (H8PS-SOFT- V1) by connecting a personal computer to the Cam Positioner using • Set the mode switch to TEST. the USB cable (Recommended USB Cables: ELECOM CO.Ltd. U2C-MF20BK). Mode Support Software Functions PRGM TEST Writing cam programs RUN Setting functions Editing, saving, and printing programs • Operate the Encoder and check the timing of operation. Displaying and printing cam program operation charts 12 7 Simple simulations of programs TST Applicable OS: Windows 98, 2000, ME, or XP Refer to the user’s manual for the Support Software for details. Present angular position ON/OFF angle setting CAM STEP • If the timing is not correct, change the ON/OFF angle settings. The settings can be changed in Test Mode. Note: 1. Outputs will turn ON and OFF in Test Mode. Confirm system safety before switching to Test Mode. 2. With 16-/32-output model, be sure to turn ON the start input. Outputs are not turned ON unless the start input is turned ON. 23 H8PS Operation (Run Mode) Starting Operation All Protection Function The all protection function locks the H8PS in Run Mode and prohibits • Set the mode switch to RUN to start operation. any changes to settings. It can be used to prevent incorrect or Mode unauthorized operation. If the Key is pressed for at least 5 s in ADV PRGM Run Mode, the All Protection indicator will light on the display TEST RUN and all keys and switches will be disabled. If the mode switch is changed to Programming or Test Mode while protection is enabled, the All Protection indicator will flash to indicate that settings 12 7 cannot be changed. If a setting on the DIP switch is changed while RUN Start input protection is enabled, the All Protection indicator will flash when indication the power supply is turned ON to indicate that settings cannot be (See note.) Present angular position changed. All Protection Function Disabled (Normal Operation) Speed (r/min) 12 456 CAM STEP RUN Note: For 16/32-output models, be sure that the start input is ON and that the start input indicator is lit. Outputs (including the cam, pulse, and run outputs) will not function if the start input is OFF. The 8-output models do not have a start input. Switching the Angle and Speed Displays STEP CAM ON↑ ↓OFF • Press the Key for at least 1 s in Run Mode to reverse the Press the ADV Key for 5 s min. display positions of the present angular position and speed (r/min) between main display and sub-display. 12 7 All Protection Function Enabled RUN 12 456 All protection indication RUN Present angular position on main display Speed (r/min) on sub-display Press the Key for 1 s min. ON↑ ↓OFF CAM STEP Checking ON/OFF Angle Settings 12 7 During Run Mode, the CAM Keys and STEP Keys RUN can be used to check the ON/OFF angle settings for any step. Also, the Key can be pressed to check the ON/OFF angle CHECK Speed (r/min) on main display settings in order for all steps starting from cam 1. If there is no key operation for 10 s or longer during the checking operation, the previous display will be resumed. Present angular position on sub-display 24 H8PS Clearing Settings Clearing All Programs Clearing Individual Steps, Cams, and Banks The all clear function can be used to delete all cam programs, the ON/OFF angle settings can be deleted by step, by cam, or by bank. If settings for advance angle compensation function, and all other settings are deleted by cam, the settings for the advance angle settings. All settings in the Function Setting Mode will be returned to compensation (ADV) function will not be deleted. If settings are their default settings. deleted by bank, the settings for the ADV function will also be deleted. Settings in the Function Setting Mode will not be deleted. Mode Set the mode switch to PRGM or TEST. Mode PRGM Set the mode switch to PRGM or TEST. TEST PRGM RUN TEST RUN Initial Display Initial Display PRG PRG CAM STEP CAM STEP Press the CLEAR Key for 3 s min. Press the CLEAR Key. PRG Screens for Individually Clearing Items Confirm that clr flashes on the display. PRG Deleting Settings by Step Press the STEP Keys to specify the step to be STEP CAM deleted. Press the WRITE Key. CAM STEP CLEAR Key PRG Deleting Settings by Cams PRG After the completion of all clear Press the CAM Keys to processing, the screen displays end for specify the cam to be approximately one second and then deleted. resume the previously displayed screen. If the CLEAR Key is pressed again before CAM STEP pressing the WRITE Key, the settings will PRG Deleting Settings by Banks not be deleted and the previous display Press the BANK Key to will be resumed. specify the bank to be deleted. CAM STEP Press the WRITE Key. CLEAR Key. PRG After the completion of all clear processing, the screen displays end for approximately one second and then resume the previously displayed screen. If the CLEAR Key is pressed again before pressing the WRITE Key, the settings will not be deleted and the previous display will be resumed. 25 H8PS ■ Advanced Functions Set the advanced functions as required to perform more advanced operation. Outlines of the advanced functions are provided on the following pages. For details, refer to the Operation Manual (Cat. No. Z199). Mode Transitions The values in parentheses are the default settings. ADV Key 3 s min. Function Setting Mode PRGM TEST Programming Mode PRG ➾ Refer to pages 28 to 30. RUN Changed with the mode switch. : No. of pulse outputs [60] PRGM ADV Key TEST TST Test Mode RUN : Pulse output start angle [0°] Changed with the mode switch. ADV Key PRGM : Speed alarm upper limit [---] RUN TEST Run Mode ADV Key RUN : Speed alarm lower limit [---] ADV Key ADV Key : Step number limit [---] (See note 1.) ADV Key 5 s min. ON/OFF Key 1 s min. ADV Key : Cam protection [None] ADV Key All Protection Switching the Angle Setting the : Bank enable/disable [Disable] and Speed Display ADV Function Disables all keys ADV Key and switches. Main Display: Angle Advance angle compensation (ADV) Sub-display: Speed : Bank switching method [Bank inputs] (See note 2.) will light when the all function automatically protection function is ↓ ↑ ADV Key advances the ON/OFF Main Display: Speed enabled. angle of outputs in : Bank copy (See note 2.) Sub-display: Angle ➾ Refer to page 24. proportion to the machine (Encoder) ➾ Refer to page 24. ADV Key speed. : E24 detection enable/disable [Enable] ADV Key Shaded items above are not displayed for 8-output models. Note 1: The default setting is for 10 steps for all cams. Note 2: Not displayed when F7 is disabled. 26 H8PS Advance Angle Compensation (ADV) Function Example: Setting the ADV Value to 2° at 100 r/min for Cam 4 The advance angle compensation function automatically advances 1. Set the mode switch to PRGM or TEST. the ON/OFF angle of cam outputs in proportion to machine 2. Set cam number 4 with the CAM Keys . (See note.) (encoder) speed. As the speed of the machine increases, the system 3. Press the Key to move to the ADV function setting display ADV can be affected by the delay in outputs. If the ADV function is used, and confirm that “ADV” is displayed. the output delay caused by higher speeds is automatically compensated. Setting Display As shown in the following diagram, ADV function is used to linearly compensate outputs according to the speed based on the ADV value TST setting for a specific speed. 4. Set the speed to 100 with the ADV value ANGLE Keys and then press the Key. WRITE STEP CAM 2° Amount of angle compensation TST 5. Set the ADV value to 2 with the 0 100 Speed (r/min) ANGLE Keys . Note: The maximum amount of angle compensation is 360°. Cam program setting CAM STEP 100° 180° 8° advance angle compensation At high speed TST (400r/min) 6. Press the Key to write WRITE 92° 172° the settings to memory. Example: ADV Value Set to 2° at 100 r/min ADV value can be set independently for cams 1 to 7 (7 total). For the ADV function, the speed and the amount of angle compensation are set. If “- - -” is displayed for any setting, the ADV function is disabled. STEP CAM The setting ranges are given in the following table. 7. Press the Key after finishing setting the ADV function. The ADV Encoder Speed ADV value previous display in Programming or Test Mode will be resumed. Resolution Display angle Note: If the bank function is being used, set the bank number before - - - - - - 256 256 “ ”, 1 to 1,600 “ ”, 0 to 255 setting the cam number. - - - - - - 256 360 “ ”, 1 to 1,600 “ ”, 0 to 359 - - - - - - 360 --- “ ”, 1 to 1,600 “ ”, 0 to 359 - - - - - - 720 --- “ ”, 1 to 800 “ ”, 0 to 359.5 Note: Default settings are shown in reverse type. The maximum response speed will decrease as shown in the following table when ADV values are set for 4 cams or more. Number of cams Encoder resolution Max. response with ADV settings speed 0 to 3 256/360 1,600r/min 720 800r/min 4 to 7 256/360 1,200r/min 720 600r/min Note: Even if the ADV value is set to 0°, the cam must be included in the number of cams with ADV settings. 27 H8PS Pulse Output (f1/f2) Speed Alarm Outputs (f3/f4) Outputs a preset number of pulses per Encoder rotation. Pulses are Specific cam outputs can be used as Encoder speed alarm outputs. output at a 1:1 ON/OFF ratio and pulse output can be started from a Alarms can be output for upper and lower speed limits. specified angle. Speed Operation for 9 Output Pulses and a Start Angle of 0° Upper limit SV 1 23 4567 8 9 Lower limit SV 0° 90° 180° 270° 0° Upper Limit Alarm Output Output start angle Operation for 9 Output Pulses and a Start Angle of 10° Lower Limit Alarm Output 1 23 4567 8 9 The speed alarm outputs are assigned to cam outputs as shown in the following table. The speed alarms are set to “- - -” for the default 0°10° 90° 180° 270° 0° settings, i.e., the normal cam outputs are enabled. If a speed alarm is Output start angle set to any value but “- - -”, the normal cam output for the corresponding cam number will be disabled. Number of Output Pulses (f1) Select the number of pulses per rotation from the following table. Upper Limit Lower Limit Alarm Output Alarm Output Encoder resolution Settable number of pulses H8PS-8@ (8 outputs) Cam 7 Cam 8 256 1, 2, 3, 4, 5, 6, 9, 10, 12, 15, 18, 20, H8PS-16@ (16 outputs) Cam 15 Cam 16 30, 36, 45, 60 , 90 H8PS-32@ (32 outputs) Cam 31 Cam 32 360 1, 2, 3, 4, 5, 6, 9, 10, 12, 15, 18, 20, 30, 36, 45, 60 , 90, 180 The setting ranges for the upper and lower limits speed alarm are 720 1, 2, 3, 4, 5, 6, 8, 9, 10, 12, 15, 18, 20, 24, given in the following table. 30, 36, 40, 45, 60 , 72, 90, 120, 180, 360 Encoder resolution Speed Note: Default settings are shown in reverse type. 256, 360 “ - - - ” or 0 to 1,600 r/min Example: Setting 90 Pulses per Rotation 720 “ - - - ” or 0 to 800 r/min The number of pulses is set using the F1 menu in the Function Note: Default settings are shown in reverse type. Setting Mode. Speed Alarm Upper Limit (f3) Setting Display PRG Example: Setting the Upper Limit Set Value to 700 r/min for a 16- output Model Set the number of pulses with the The upper limit set value is set using the F3 menu in the Function ANGLE Keys and then press the Setting Mode. Key. WRITE Upper Limit Setting Display CAM STEP PRG Pulse Output Start Angle (f2) Set the upper limit set value to 700 with The setting ranges are given in the following table. the ANGLE Keys and then press the Key. (See note.) WRITE Encoder Start angle Resolution Display CAM STEP angle 256 256 0 to 255° Note: If banks are being used, the bank number must be set. 256 360 0 to 359° (See note 2.) Speed Alarm Lower Limit (f4) 360 --- 0 to 359° 720 --- 0 to 359.5° Example: Setting the Lower Limit Set Value to 20 r/min for a 16- output Model Note: 1. Default settings are shown in reverse type. 2. The output accuracy is 2° maximum, so not all angles can The lower limit set value is set using the F4 menu in the Function be set. Setting Mode. Example: Setting the Pulse Output Start Angle to 100° Lower Limit Setting Display The starting angle for pulse outputs is set using the F2 menu in the PRG Function Setting Mode. Set the upper limit set value to 20 with Setting Display the ANGLE Keys and then press the Key. PRG WRITE Set the pulse output start angle to 100 STEP CAM with the ANGLE Keys and then Note: If banks are being used, the bank number must be set. press the Key. WRITE CAM STEP 28 H8PS Step Number Limit (f5) Bank Functions (f7/f8/f9) With the H8PS, up to 10 steps can be set to turn the output ON/OFF The bank function is supported by 16-/32-output models. Banks 10 times for each cam. The number of steps that can be set, enable changing the entire cam program at once by switching bank however, can be restricted to prevent programming from being added numbers (0 to 7). through operating mistakes. Settings can be made for all cams at once or each cam individually. The default setting for the Step Cam Program (Bank No. 7) Number Limit is 10 steps for all cams. Example: Limiting the Number of Steps to 2 for All Cams Cam Program (Bank No. 2) Collectively. Cam Program (Bank No. 1) Cam Program (Bank No. 0) The maximum number of steps to be set is set using the F5 menu in Step 0 Step 1 Step 9 Control output (cam number) the Function Setting Mode. ON angle OFF angle ON angle OFF angle ON angle OFF angle 145° 90° 135° 225° 270° 315° Display for Collective Settings 20° 90° 135° 180° --- --- PRG 32 90° 225° 270° 285° 315° 345° Set the cam number to a with the CAM Keys and set the In Run Mode or Test Mode, the start input must be turned OFF and maximum number of steps to 2 with ON as shown in the following diagram in order to change banks. the Angle Keys . Press the Control the start input when changing banks. Key to write the setting to WRITE memory. Bank Bank 0 Bank 1 Bank 2 specification STEP CAM T4 ON Start The cam number can be set to a on the setting display to set all input OFF cams at once. If the number of steps is displayed as “---” when the T2 T1 T2 T3 cam number is a, the collective settings for all cams are disabled. Operation Bank 0 Bank 1 Bank 2 Example: Limiting the Number of Steps to 1 for Cam 3. ON The maximum number of steps to be set is set using the F5 menu in RUN output the Function Setting Mode. OFF Display for Individual Settings Unstable region (outputs OFF) T1: 225 ms max. T2: 400 ms max. T3: 20 ms min. PRG T4: 20 ms min. Set the cam number to 3 with the CAM Keys and set the maximum number of steps to 1 with Bank Enable/Disable (f7) the Angle Keys . Press the The default setting disables the bank function. To use banks, change Key to write the setting to WRITE the setting using the F7 menu in the Function Setting Mode. memory. Setting Display CAM STEP PRG Enable or disable the bank function Cam Protection (f6) with the ANGLE Keys . Cam programs can be write-protected. Use this setting to protect the programs for only specific cam numbers. Protected cam numbers will yes no not be displayed in Programming Mode or Test Mode. Writing or (Enabled) (Disabled) changing programs will not be possible. Protected cam numbers will also not be displayed in Run Mode and cannot be checked. The CAM STEP default settings are for no protection for all cams. Bank Switching Method (f8) Example: Protecting Cam 3 with an 8-output Model The following methods can be used to switch the bank: the bank Cam protection is set using the F6 menu in the Function Setting inputs on the terminal block or the BANK Key on the front of the Cam Mode. Positioner. Setting Display Not lit (protected) 12 4567 8 PRG Set the cam number to be protected (and not displayed) to 3 with the CAM Keys and then press the Key. The WRITE output display will go out. CAM STEP 29 H8PS Bank Switching Method (f8) Bank Copy (f9) The following methods can be used to switch the bank: the bank Programs can be copied between banks. This function is convenient inputs on the terminal block or the BANK Key on the front of the Cam to copy a program to a different bank when only some of the ON/OFF angle settings need to be changed. Positioner. The method is set using the F8 menu in the Function Setting Mode. Note: This operation can be used only when the Bank Function (F7) has been enabled. Setting Display Description Bank input Banks can be changed only with the bank in Example: Copying the Program in Bank 2 to Bank 3 (IN) inputs. Even if a different bank number is displayed in Programming Mode, the bank Banks are copied using the F9 menu in the Function Setting Mode. specified with the bank inputs will be used Setting Display after switching to Run Mode or Test Mode. 1. Set the number of the bank to be copied. Bank Key key Banks can be changed only with the (KEY) BANK Key. Bank inputs are disabled. PRG Note: 1. Default settings are shown in reverse type. 2. This setting can be made only when the Bank Function (F7) Set bank number 2 (the copy has been enabled. source) with the BANK Key and Setting Display then press the Key. WRITE PRG CAM STEP Use the ANGLE Keys to set the bank switching method. 2. Set the number of the bank to receive the copy. PRG in key (IN) (KEY) Set bank number 3 (the copy CAM STEP destination) with the Key and BANK The bank inputs on the terminal block are used as shown in the then press the Key. WRITE following table. Bank No. Bank input terminals CAM STEP 1 2 4 3. Execute the copy. 0 OFF OFF OFF PRG 1 ON OFF OFF 2 OFF ON OFF 3 ON ON OFF Confirm that cpy is displayed and then press the Key again. 4 OFF OFF ON WRITE 6 ON OFF ON 6 OFF ON ON STEP CAM 7 ON ON ON 4. Copying completed. ON: Shorted to COM terminal. PRG OFF: Open After completion of copying end is displayed for approx. 1 s and the previous display will be resumed. CAM STEP E24 Detection (f10) Displaying E24 errors (Encoder disconnected) can be disabled. The Setting Display setting does not normally need to be changed. When the Y92C-30 Parallel Input Adapter (order separately) is used to connect more PRG than one H8PS to the same Encoder, an E24 error can appear even Enable or disable E24 detection if the Encoder connection is normal. If this happens, use the E24 with the ANGLE Keys . Detection function (F10) in the Function Setting Mode to disable E24 detection displays. yes no Setting Display Description (Enabled) (Disabled) Enabled An E24 error will be displayed if the yes Encoder is not connected correctly in CAM STEP Run Mode or Test Mode. Disabled no An E24 error will not be displayed even if an Encoder is not connected. Note: Default settings are shown in reverse type. 30 H8PS ■ Self Diagnostic Function The following displays will appear on the main display if an error occurs. If an error occurs, all outputs (including cam, pulse, and run outputs) will be turned OFF. Display Meaning Recovery method e00 Origin designation data error Press the CLEAR Key for at least 3 s. All settings, including the origin designation data, will be initialized. e11 Memory error: RAM error Cycle the power supply. e12 Memory error: Checksum error Press the CLEAR Key for at least 3 s. All settings, including the origin designation data, will be initialized. e13 CPU error Cycle the power supply. e21 Response speed exceeded The Encoder is rotating faster than the allowable range. Reduce the speed to within the allowable range. Then cycle the power supply or switch to Programming Mode and then to Run Mode. e22 Encoder data error There are surges or noise around the product or in the wiring. Check the wiring and protect the product from surges and noise. Then cycle the power supply. e23 Encoder resolution inconsistent Set the Encoder resolution according to the specifications of the Encoder. Then cycle the power supply. e24 Encoder disconnected Connect the Encoder connector properly. Then, cycle the power supply or switch to Programming Mode and then to Run Mode. Angle Data Table To assist with programming when using an Encoder with a resolution of 256/rotation, displays and settings may be done by conversion to 360 degrees by setting a pin on the DIP switch inside the front cover. The following table shows the conversions. 0 1 2 3 4 5 6 7 8 9 10 11 12 13 14 15 0° 1° 3° 4° 6° 7° 8° 10° 11° 13° 14° 15° 17° 18° 20° 21° 16 17 18 19 20 21 22 23 24 25 26 27 28 29 30 31 23° 24° 25° 27° 28° 30° 31° 32° 34° 35° 37° 38° 39° 41° 42° 44° 32 33 34 35 36 37 38 39 40 41 42 43 44 45 46 47 45° 46° 48° 49° 51° 52° 53° 55° 56° 58° 59° 60° 62° 63° 65° 66° 48 49 50 51 52 53 54 55 56 57 58 59 60 61 62 63 68° 89° 69° 70° 72° 73° 75° 76° 77° 79° 80° 82° 83° 84° 86° 87° 64 65 66 67 68 69 70 71 72 73 74 75 76 77 78 79 90° 111° 91° 93° 94° 96° 97° 98° 100° 101° 103° 104° 105° 107° 108° 110° 80 81 82 83 84 85 86 87 88 89 90 91 92 93 94 95 113° 134° 114° 115° 117° 118° 120° 121° 122° 124° 125° 127° 128° 129° 131° 132° 96 97 98 99 100 101 102 103 104 105 106 107 108 109 110 111 135° 156° 136° 138° 139° 141° 142° 143° 145° 146° 148° 149° 150° 152° 153° 155° 112 113 114 115 116 117 118 119 120 121 122 123 124 125 126 127 158° 179° 159° 160° 162° 163° 165° 166° 167° 169° 170° 172° 173° 174° 176° 177° 128 129 130 131 132 133 134 135 136 137 138 139 140 141 142 143 180° 201° 181° 183° 184° 186° 187° 188° 190° 191° 193° 194° 195° 197° 198° 200° 144 145 146 147 148 149 150 151 152 153 154 155 156 157 158 159 203° 224° 204° 205° 207° 208° 210° 211° 212° 214° 215° 217° 218° 219° 221° 222° 160 161 162 163 164 165 166 167 168 169 170 171 172 173 174 175 225° 246° 226° 228° 229° 231° 232° 233° 235° 236° 238° 239° 240° 242° 243° 245° 176 177 178 179 180 181 182 183 184 185 186 187 188 189 190 191 256 display (Encoder output data) 248° 249° 250° 252° 253° 255° 256° 257° 259° 260° 262° 263° 264° 266° 267° 269° How to Use the Table 192 193 194 195 196 197 198 199 200 201 202 203 204 205 206 207 270° 271° 273° 274° 276° 277° 278° 280° 281° 283° 284° 285° 287° 288° 290° 291° 01 208 209 210 211 212 213 214 215 216 217 218 219 220 221 222 223 0° 1° 293° 294° 295° 297° 298° 300° 301° 302° 304° 305° 307° 308° 309° 311° 312° 314° 224 225 226 227 228 229 230 231 232 233 234 235 236 237 238 239 315° 316° 318° 319° 321° 322° 323° 325° 326° 328° 329° 330° 332° 333° 335° 336° 240 241 242 243 244 245 246 247 248 249 250 251 252 253 254 255 338° 339° 340° 342° 343° 345° 346° 347° 349° 350° 352° 353° 354° 356° 357° 359° 360° display (360° converted data) ALL DIMENSIONS SHOWN ARE IN MILLIMETERS. To convert millimeters into inches, multiply by 0.03937. To convert grams into ounces, multiply by 0.03527. In the interest of product improvement, specifications are subject to change without notice. 31 Terms and Conditions Agreement Read and understand this catalog. Please read and understand this catalog before purchasing the products. Please consult your OMRON representative if you have any questions or comments. Warranties. (a) Exclusive Warranty. Omron’s exclusive warranty is that the Products will be free from defects in materials and workmanship for a period of twelve months from the date of sale by Omron (or such other period expressed in writing by Omron). Omron disclaims all other warranties, express or implied. (b) Limitations. OMRON MAKES NO WARRANTY OR REPRESENTATION, EXPRESS OR IMPLIED, ABOUT NON-INFRINGEMENT, MERCHANTABILITY OR FITNESS FOR A PARTICULAR PURPOSE OF THE PRODUCTS. BUYER ACKNOWLEDGES THAT IT ALONE HAS DETERMINED THAT THE PRODUCTS WILL SUITABLY MEET THE REQUIREMENTS OF THEIR INTENDED USE. Omron further disclaims all warranties and responsibility of any type for claims or expenses based on infringement by the Products or otherwise of any intellectual property right. (c) Buyer Remedy. Omron’s sole obligation hereunder shall be, at Omron’s election, to (i) replace (in the form originally shipped with Buyer responsible for labor charges for removal or replacement thereof) the non-complying Product, (ii) repair the non-complying Product, or (iii) repay or credit Buyer an amount equal to the purchase price of the non-complying Product; provided that in no event shall Omron be responsible for warranty, repair, indemnity or any other claims or expenses regarding the Products unless Omron’s analysis confirms that the Products were properly handled, stored, installed and maintained and not subject to contamination, abuse, misuse or inappropriate modification. Return of any Products by Buyer must be approved in writing by Omron before shipment. Omron Companies shall not be liable for the suitability or unsuitability or the results from the use of Products in combination with any electrical or electronic components, circuits, system assemblies or any other materials or substances or environments. Any advice, recommendations or information given orally or in writing, are not to be construed as an amendment or addition to the above warranty. See http://www.omron.com/global/ or contact your Omron representative for published information. Limitation on Liability; Etc. OMRON COMPANIES SHALL NOT BE LIABLE FOR SPECIAL, INDIRECT, INCIDENTAL, OR CONSEQUENTIAL DAMAGES, LOSS OF PROFITS OR PRODUCTION OR COMMERCIAL LOSS IN ANY WAY CONNECTED WITH THE PRODUCTS, WHETHER SUCH CLAIM IS BASED IN CONTRACT, WARRANTY, NEGLIGENCE OR STRICT LIABILITY. Further, in no event shall liability of Omron Companies exceed the individual price of the Product on which liability is asserted. Suitability of Use. Omron Companies shall not be responsible for conformity with any standards, codes or regulations which apply to the combination of the Product in the Buyer’s application or use of the Product. At Buyer’s request, Omron will provide applicable third party certification documents identifying ratings and limitations of use which apply to the Product. This information by itself is not sufficient for a complete determination of the suitability of the Product in combination with the end product, machine, system, or other application or use. Buyer shall be solely responsible for determining appropriateness of the particular Product with respect to Buyer’s application, product or system. Buyer shall take application responsibility in all cases. NEVER USE THE PRODUCT FOR AN APPLICATION INVOLVING SERIOUS RISK TO LIFE OR PROPERTY OR IN LARGE QUANTITIES WITHOUT ENSURING THAT THE SYSTEM AS A WHOLE HAS BEEN DESIGNED TO ADDRESS THE RISKS, AND THAT THE OMRON PRODUCT(S) IS PROPERLY RATED AND INSTALLED FOR THE INTENDED USE WITHIN THE OVERALL EQUIPMENT OR SYSTEM. Programmable Products. Omron Companies shall not be responsible for the user’s programming of a programmable Product, or any consequence thereof. Performance Data. Data presented in Omron Company websites, catalogs and other materials is provided as a guide for the user in determining suitability and does not constitute a warranty. It may represent the result of Omron’s test conditions, and the user must correlate it to actual application requirements. Actual performance is subject to the Omron’s Warranty and Limitations of Liability. Change in Specifications. Product specifications and accessories may be changed at any time based on improvements and other reasons. It is our practice to change part numbers when published ratings or features are changed, or when significant construction changes are made. However, some specifications of the Product may be changed without any notice. When in doubt, special part numbers may be assigned to fix or establish key specifications for your application. Please consult with your Omron’s representative at any time to confirm actual specifications of purchased Product. Errors and Omissions. Information presented by Omron Companies has been checked and is believed to be accurate; however, no responsibility is assumed for clerical, typographical or proofreading errors or omissions. 2015.10 In the interest of product improvement, specifications are subject to change without notice. OMRON Corporation Industrial Automation Company http://www.ia.omron.com/ (c)Copyright OMRON Corporation 2015 All Right Reserved.
Frequently asked questions
How does Electronics Finder differ from its competitors?

Is there a warranty for the Y92F-91?
Which carrier will Electronics Finder use to ship my parts?
Can I buy parts from Electronics Finder if I am outside the USA?
Which payment methods does Electronics Finder accept?
Why buy from GID?

Quality
We are industry veterans who take pride in our work

Protection
Avoid the dangers of risky trading in the gray market

Access
Our network of suppliers is ready and at your disposal

Savings
Maintain legacy systems to prevent costly downtime

Speed
Time is of the essence, and we are respectful of yours
Related Products
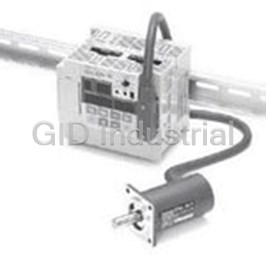
Cam Positioners With High Speed and High Precision Double Machine Productivity 3F88L160
Cam Positioners With High Speed and High Precision Double Machine Productivity 3F88L162
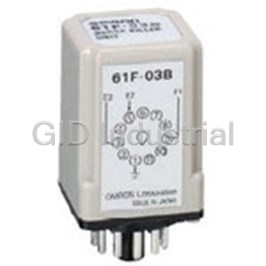
Controllers SURGE SUPRESSOR 61F-03B
Controllers SURGE SUPRESSOR 61F-04B
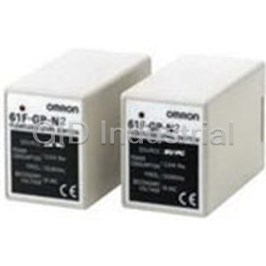
Conductive Level Controller 61F-GP-N2220VAC
Conductive Level Controller 61F-GP-N224VAC
Request a Quote

The quote request has been received
Close

Facing challenges or have inquiries? Feel free to contact us!
Call Us +1-469-283-2440
What they say about us
FANTASTIC RESOURCE
One of our top priorities is maintaining our business with precision, and we are constantly looking for affiliates that can help us achieve our goal. With the aid of GID Industrial, our obsolete product management has never been more efficient. They have been a great resource to our company, and have quickly become a go-to supplier on our list!
Bucher Emhart Glass
EXCELLENT SERVICE
With our strict fundamentals and high expectations, we were surprised when we came across GID Industrial and their competitive pricing. When we approached them with our issue, they were incredibly confident in being able to provide us with a seamless solution at the best price for us. GID Industrial quickly understood our needs and provided us with excellent service, as well as fully tested product to ensure what we received would be the right fit for our company.
Fuji
HARD TO FIND A BETTER PROVIDER
Our company provides services to aid in the manufacture of technological products, such as semiconductors and flat panel displays, and often searching for distributors of obsolete product we require can waste time and money. Finding GID Industrial proved to be a great asset to our company, with cost effective solutions and superior knowledge on all of their materials, it’d be hard to find a better provider of obsolete or hard to find products.
Applied Materials
CONSISTENTLY DELIVERS QUALITY SOLUTIONS
Over the years, the equipment used in our company becomes discontinued, but they’re still of great use to us and our customers. Once these products are no longer available through the manufacturer, finding a reliable, quick supplier is a necessity, and luckily for us, GID Industrial has provided the most trustworthy, quality solutions to our obsolete component needs.
Nidec Vamco
TERRIFIC RESOURCE
This company has been a terrific help to us (I work for Trican Well Service) in sourcing the Micron Ram Memory we needed for our Siemens computers. Great service! And great pricing! I know when the product is shipping and when it will arrive, all the way through the ordering process.
Trican Well Service
GO TO SOURCE
When I can't find an obsolete part, I first call GID and they'll come up with my parts every time. Great customer service and follow up as well. Scott emails me from time to time to touch base and see if we're having trouble finding something.....which is often with our 25 yr old equipment.
ConAgra Foods